
Why these go-to map layers are essential when e-scouting for your next western hunt

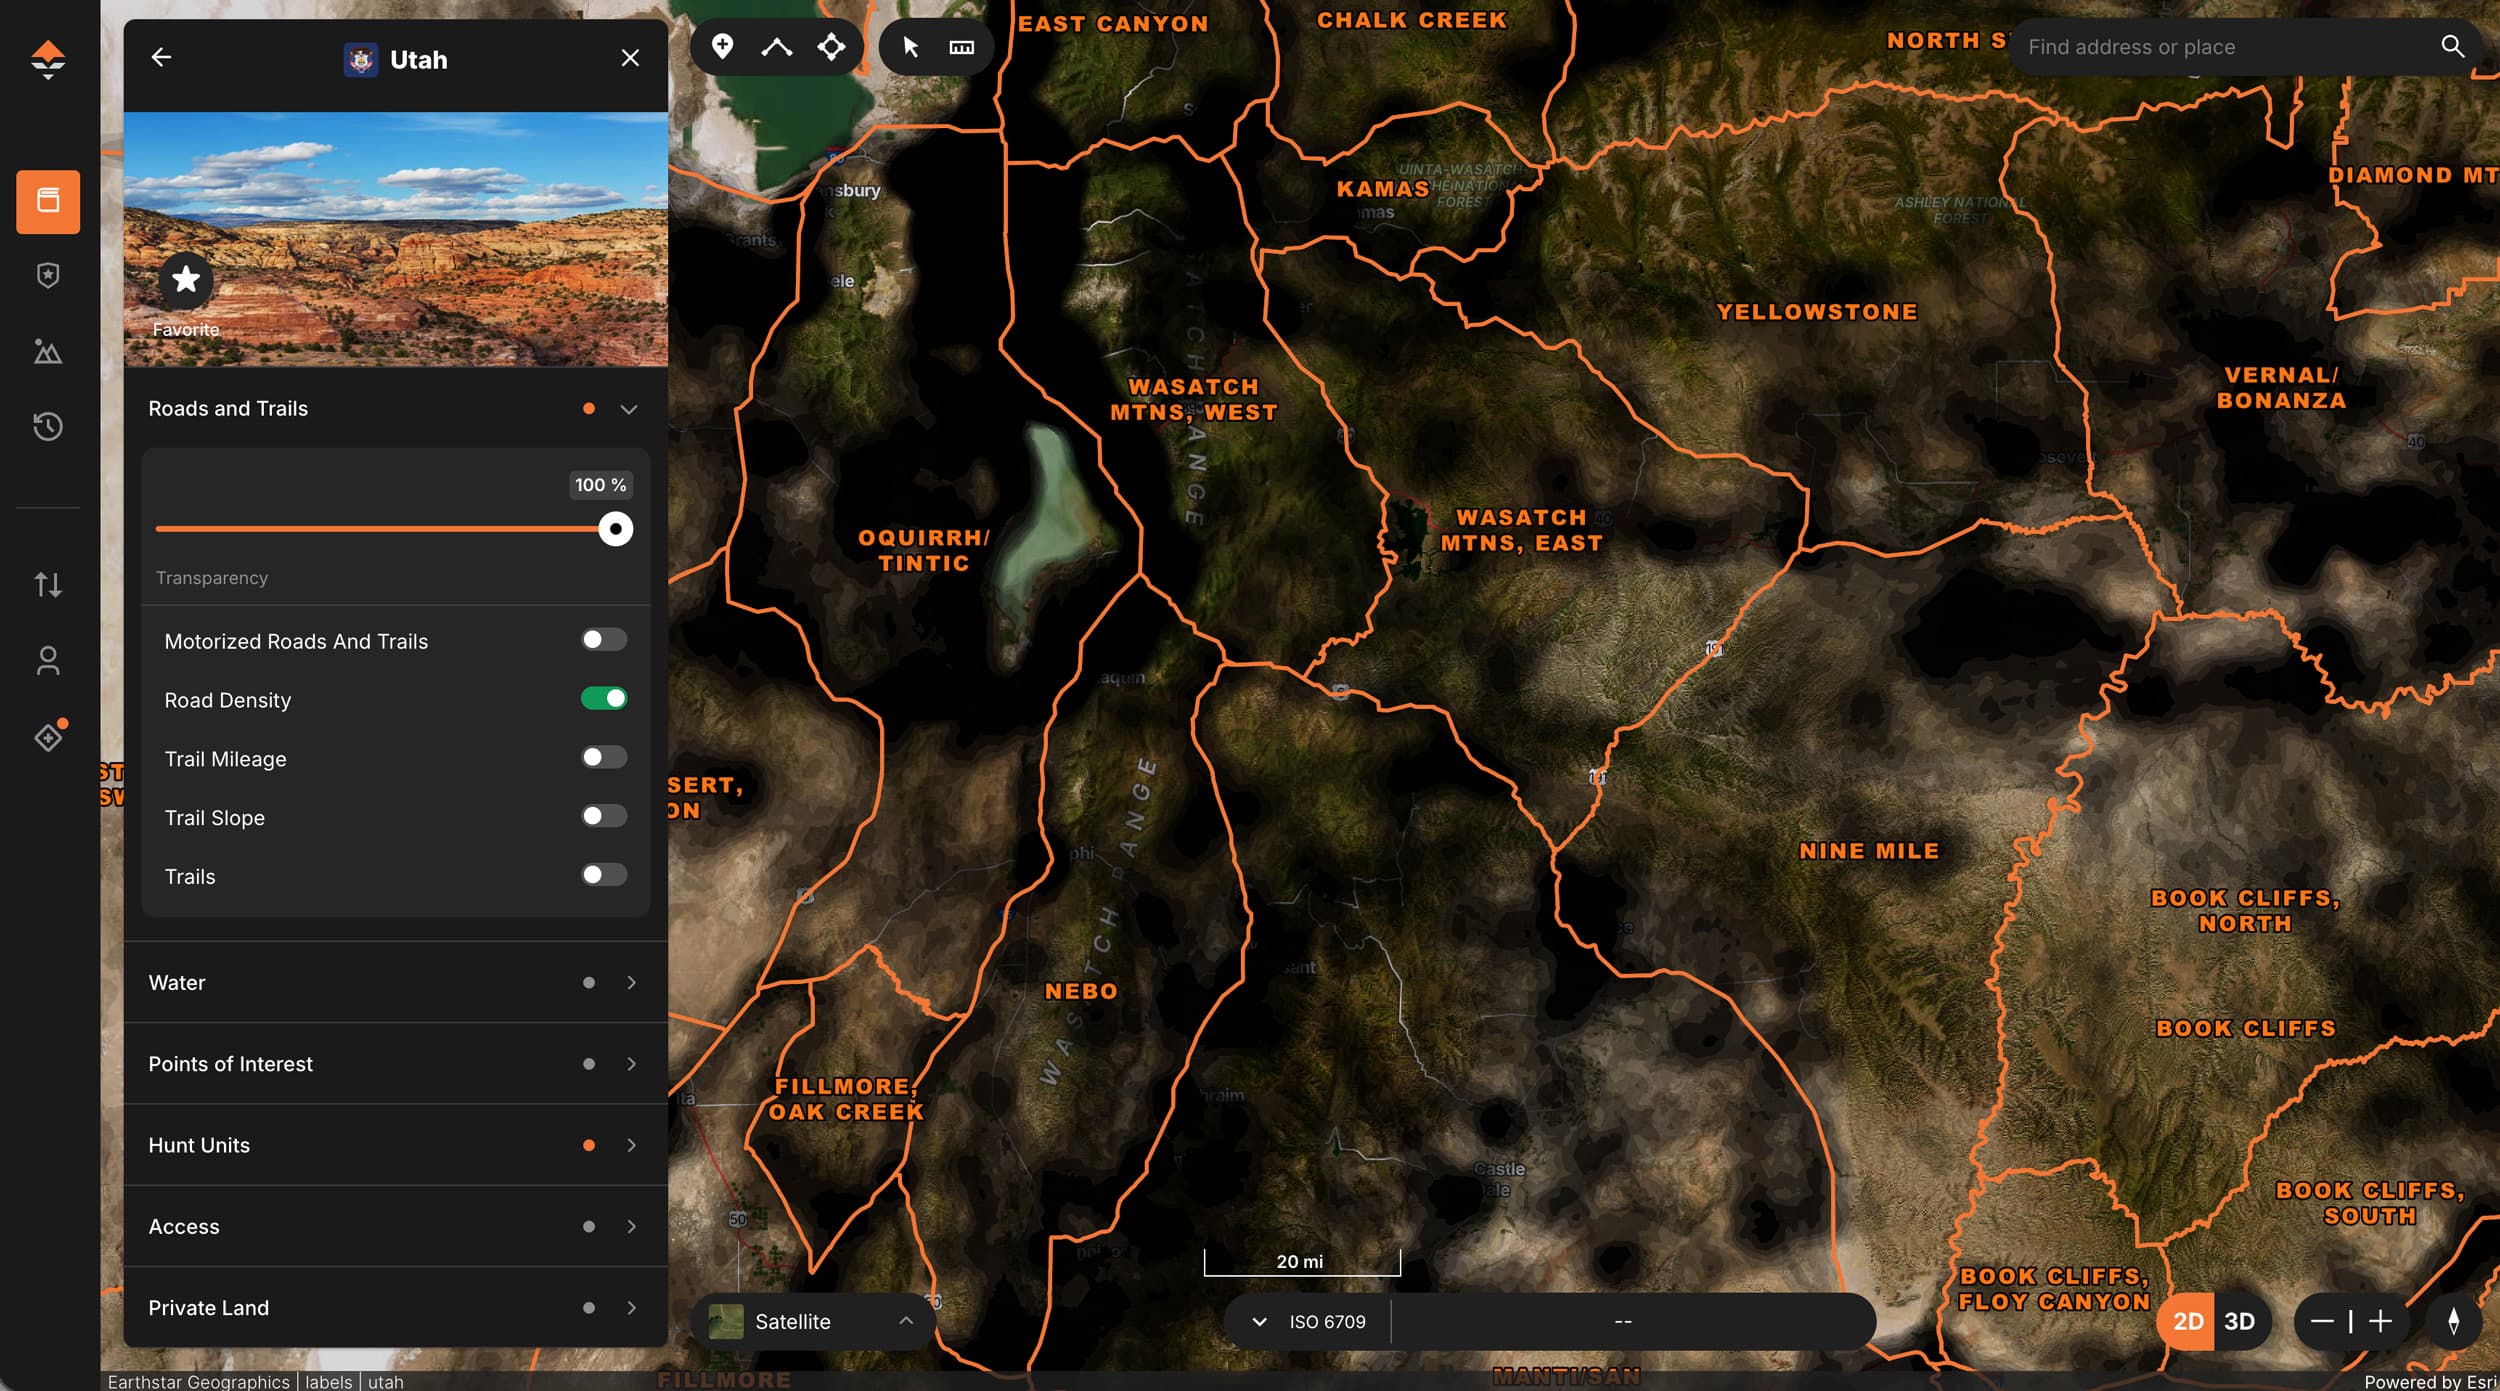
A zoomed-out view of GOHUNT's Road Density layer.
We are roughly a few days or a month, depending on where you live, from the opening day of archery season. It’s that time of year when most of us are trying to sneak out a day on the weekend to scout, but for the bulk of the week we are trapped behind a desk. That means the only chance to scout during the week is perhaps an hour or so in the morning or evening with digital maps. While I still think boots-on-the-ground scouting is undefeated, e-scouting is massively helpful.
With that, I’m spending time every day doing some e-scouting, and these are my favorite layers and map features I’m using as a western big game bowhunter. I’m going to skip a few obvious layers like unit boundaries and public/private land. The government land layer on my maps is always on for most states and units I am scouting, because I want to understand my options for access and to public land to hunt. Also keep in mind that there may be public land that is partially landlocked that you might be able to hike into where those private lands are creating refuge for big game.
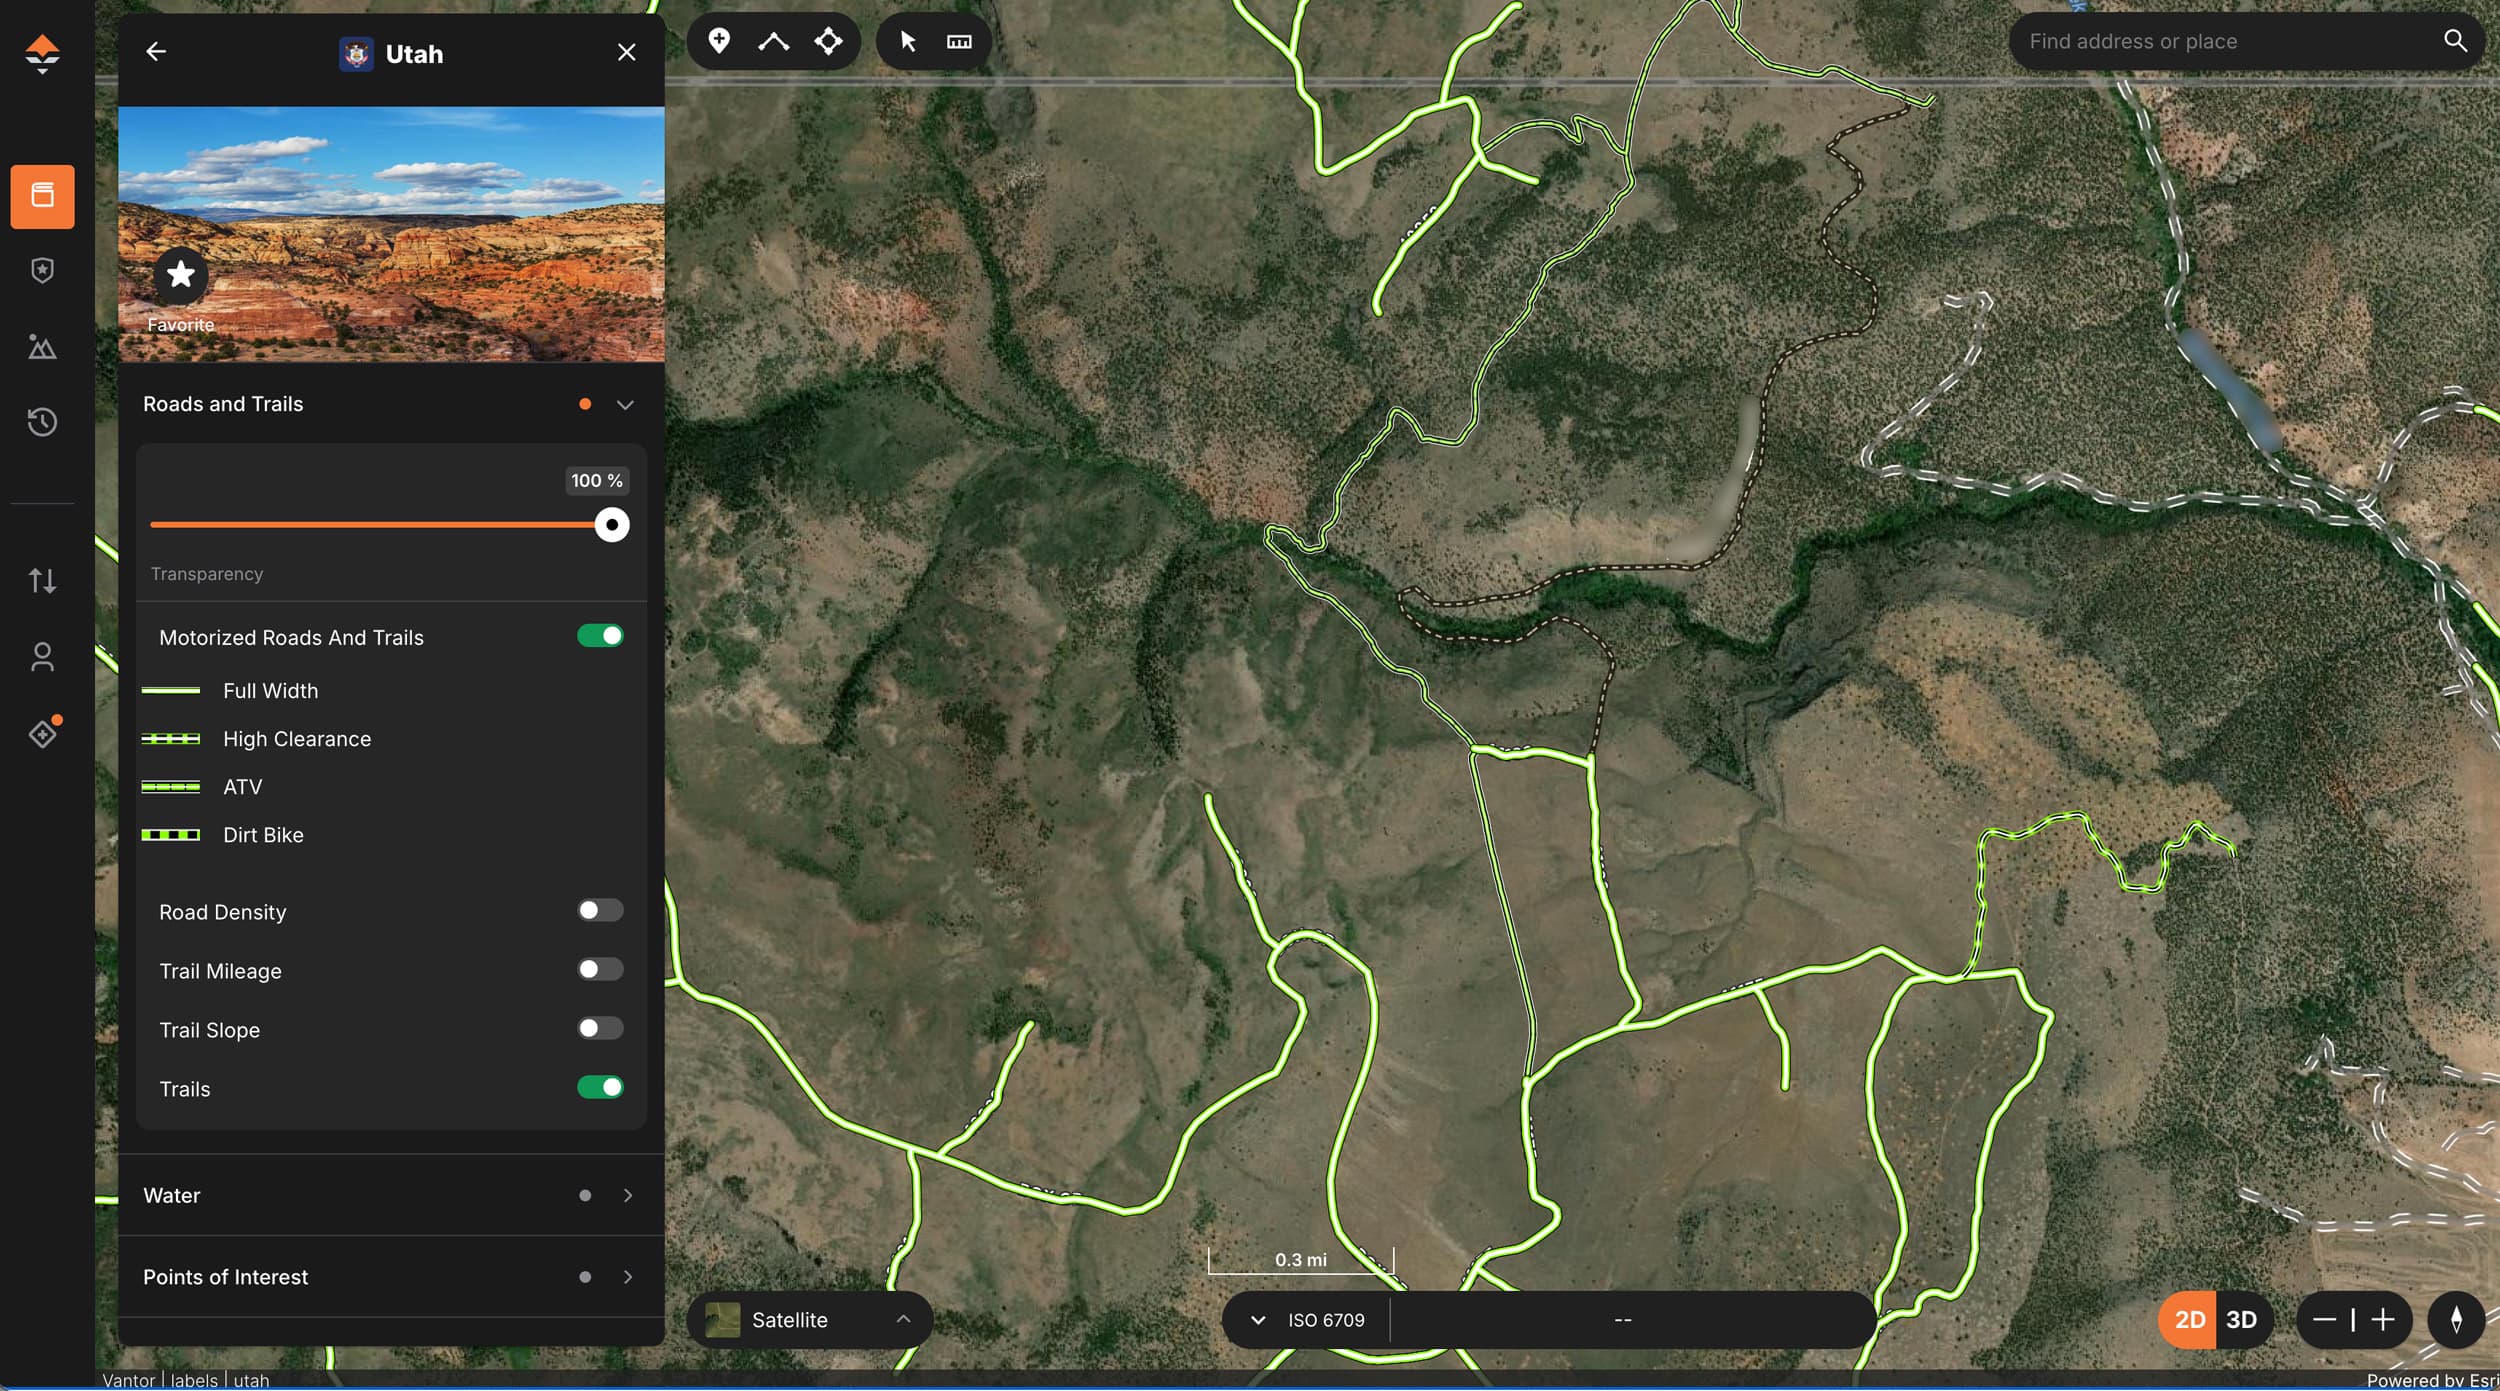
Some of the best bucks I have ever killed I have taken much closer to a road than you might think, so road/trails and road density layers aren’t everything for mule deer hunting, but I think it’s interesting and there is useful information I think you can glean from it. For one, it does allow me to quickly and visually reference where the most remote areas within my unit are. There may or may not be habitat and a big buck there, but one thing is for sure, and that’s the fact that there are going to be fewer other hunters willing to access those remote areas. So, if I can explore those areas and find a buck I’d like to hunt, it’s likely I will have less competition. Less pressure has real impacts on a buck's behavior. He may feed longer and be less likely to head into deep cover.
I like the Road Density layer as a jump-off point to begin to look for habitat within the areas that are the most remote. It’s not that I think there are bigger bucks in those areas per se, but I do think that those bucks probably feel less pressure and might be easier to hunt.
The other useful information I can gain from the roads and trails layer is that I can use it to see where road hunters are most likely to glass. Let’s not pretend that people don’t love to drive and glass. I do it myself at times, but with the lay of the land and the vegetation, only so many options to glass. The country that can be seen from roads generally does not hold a big buck, at least on public land, where it's easier to draw units. I think those bucks are aware of where they can be seen and where they can mostly remain hidden from a road hunter.
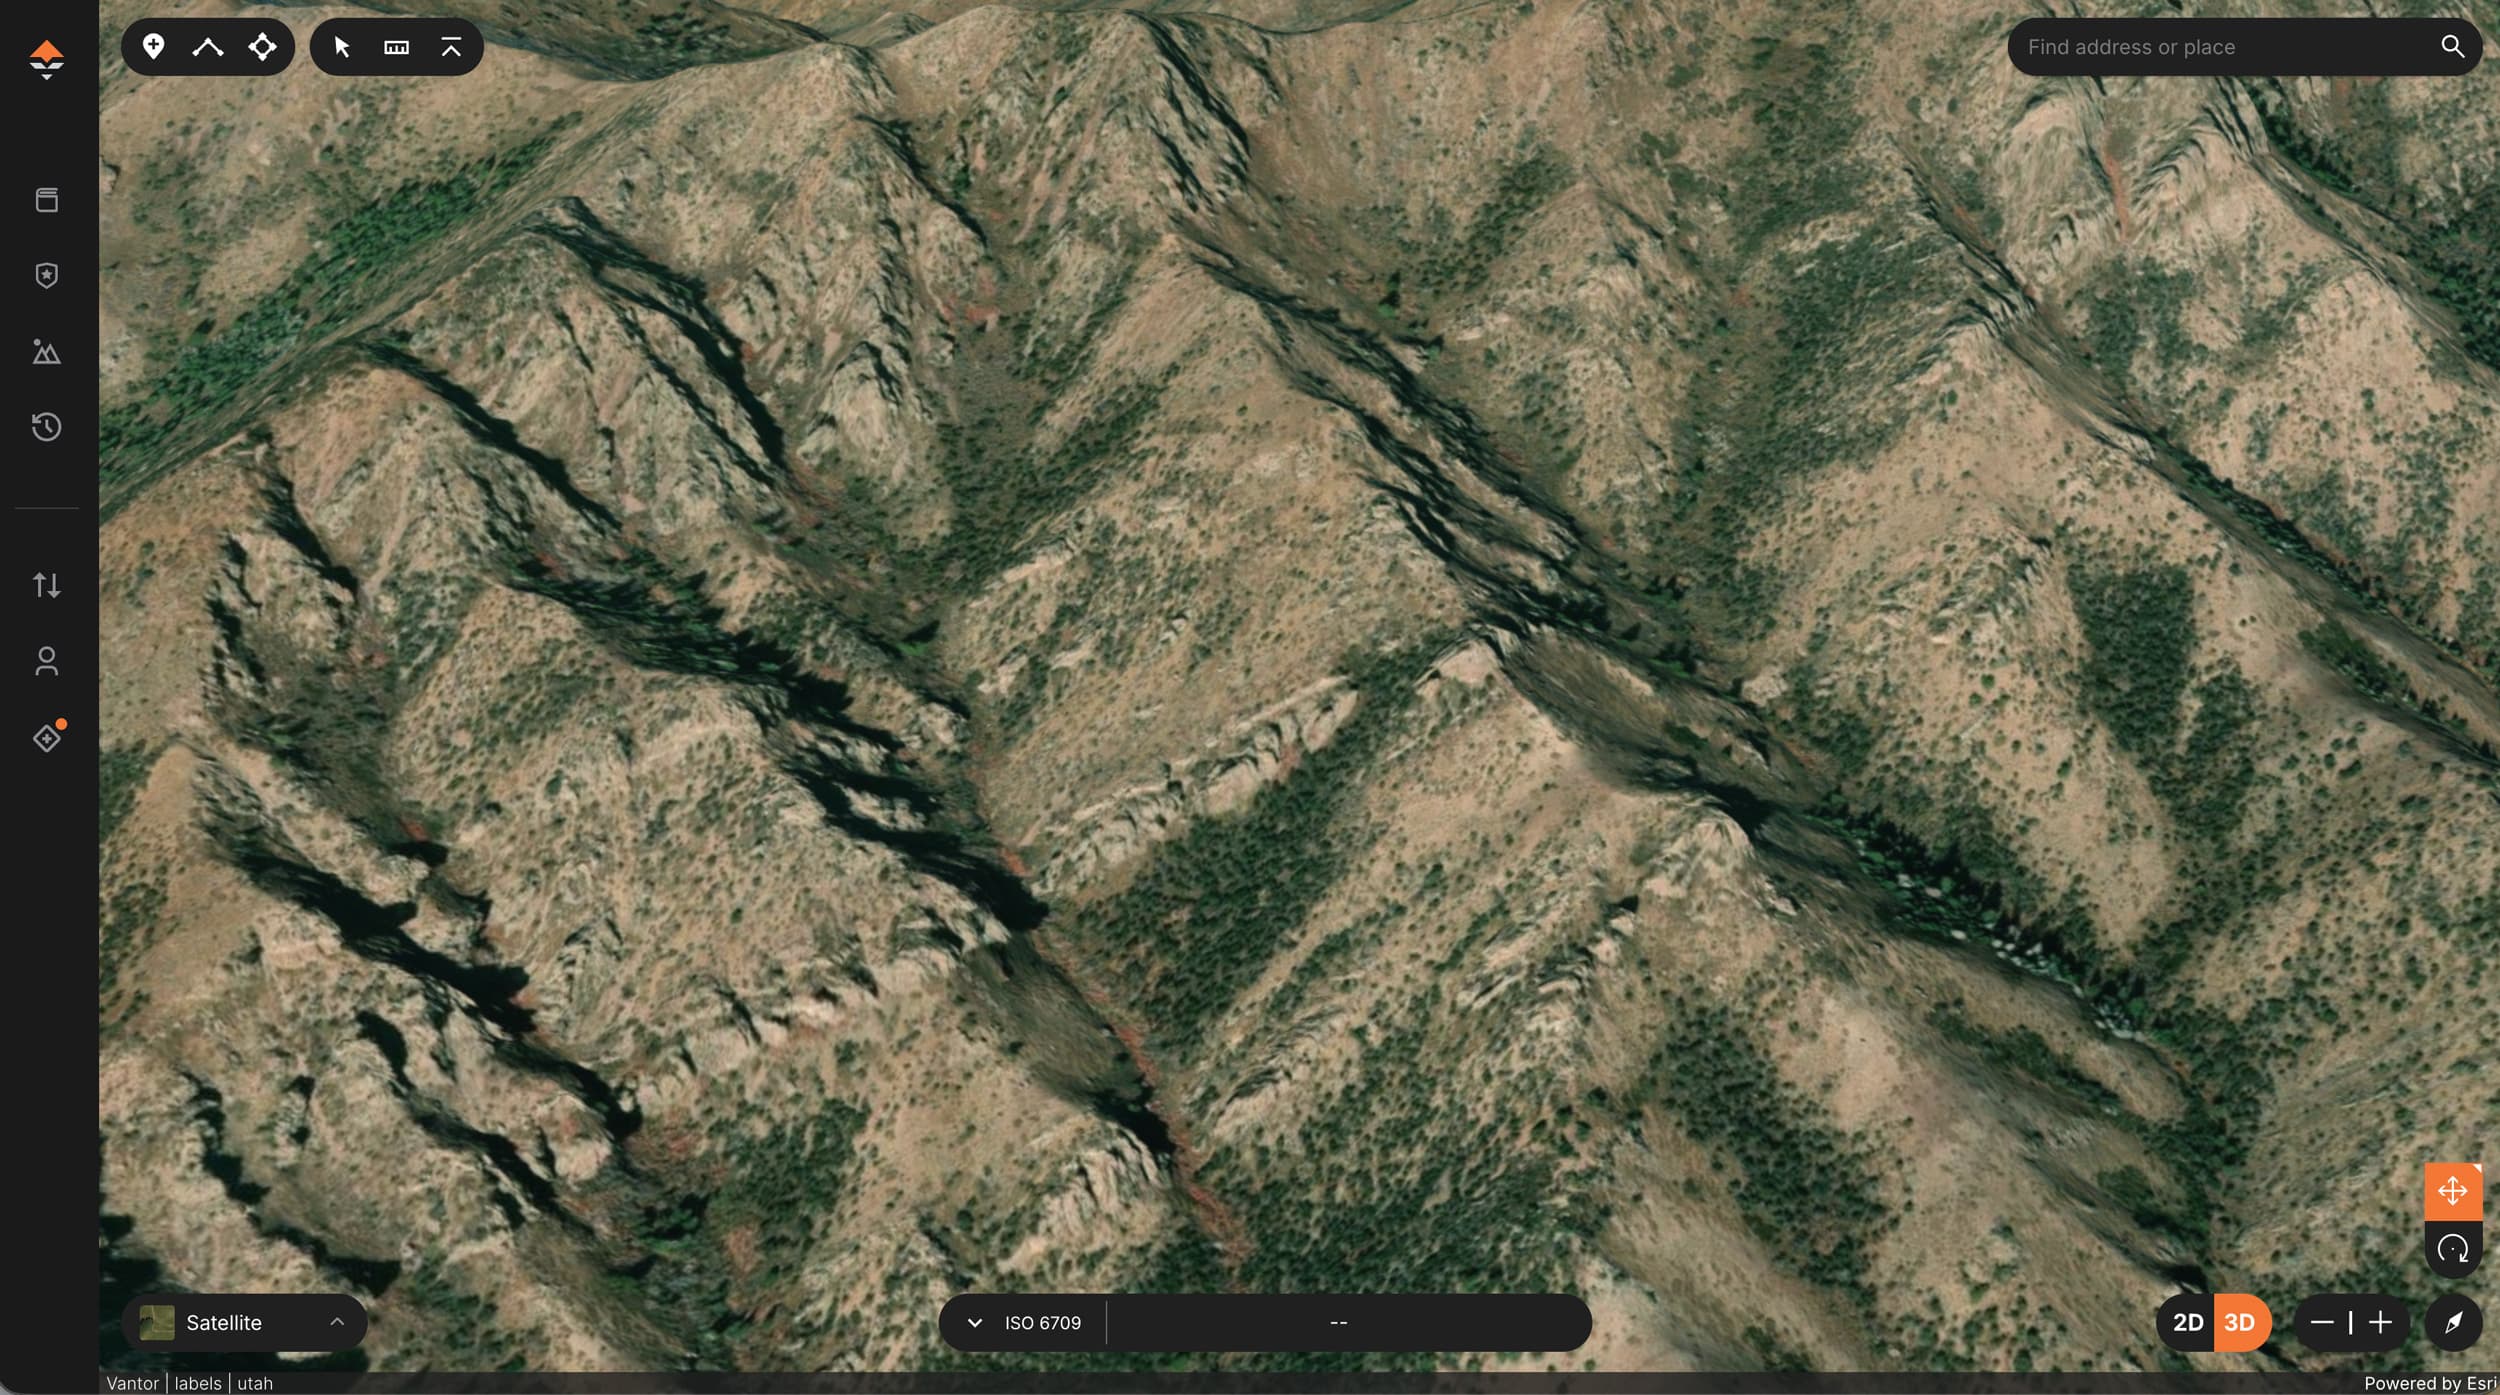
I will often use my map in 3D mode to cruise the roads virtually to see what country is easily glassable. I’ll also look for those classic “pull out” spots where you can see where people are pulling over and glassing. In addition, I’m looking for areas that offer some refuge from easy road glassing. I’m looking for the backside of a ridge that’s hidden from the road, or a pocket that has feed and cover in close proximity, but isn’t observable from the road. As I write this, I can think of several spots where I have hunted and killed nice bucks that are close to a road, but can only be seen if I am willing to hike a little ways onto a point or ridge to see them. So, roads, trails, and the road density layer are handy for understanding access, but they are also helpful in understanding hunting pressure. Hunting pressure is as much a piece of the puzzle as habitat is.
One final note before I move on. I think elk are slightly different in regard to hunting pressure. Because they are a bigger animal and have a more varied diet, it seems that they are more susceptible to pressure. In my experience, the Road Density layer is more helpful in finding and hunting elk. You still need good habitat in those areas, but if elk can find it, they will gravitate towards those remote areas. When I am looking for elk areas, the road density layer is more helpful in that regard. It’s not to say you can’t find elk a mile or two off of a road; you can, but generally speaking I have had better luck finding more elk on over-the-counter or easy-to-draw units deeper into remote country.
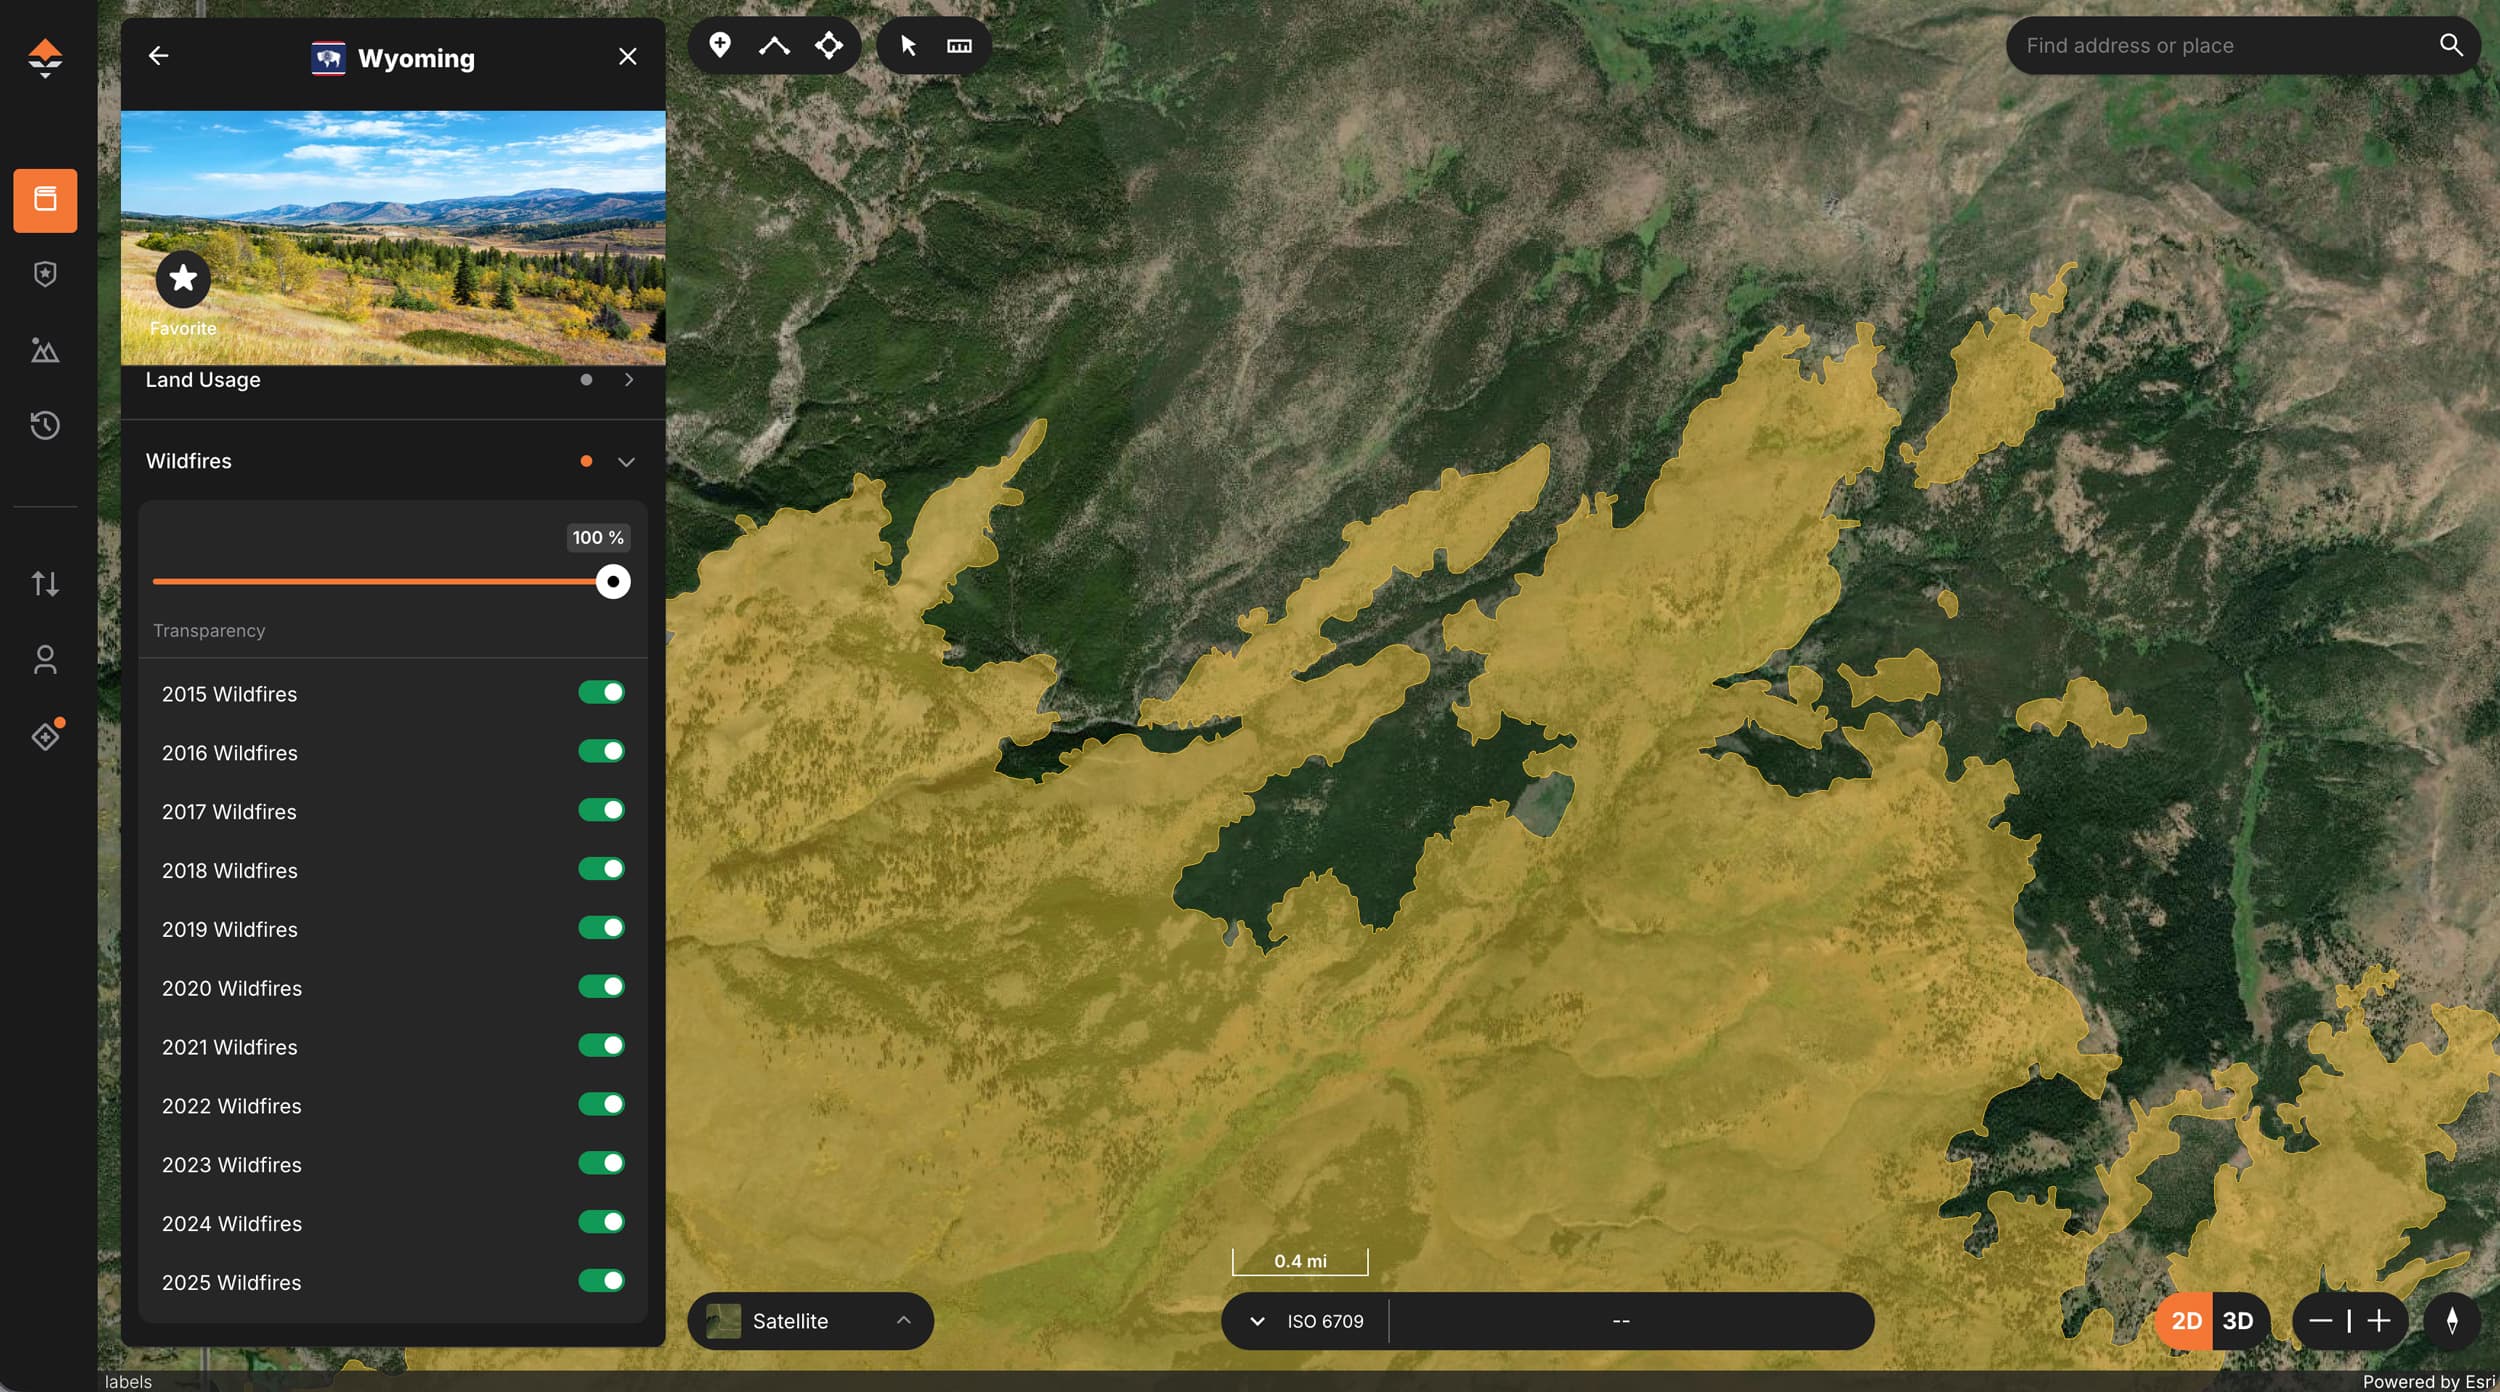
The historic wildfire layers on my GOHUNT maps are one of the first layers I add and spend time reviewing. Within GOHUNT maps, you can turn on the fire layer by year so you can visually see what year each fire burned. Wildfire scars on the landscape aren’t all beneficial to deer and elk, but when you layer the fire maps for perhaps the last ten years with the elevation bands, you can see what areas are likely to have real benefits. Mule deer love a burned area, especially on the summer range. Mixed conifer and aspen landscapes that have been burned will often respond with a flush of new growth of forbs and new aspen shoots the following years after fire. Elk also gravitate toward new burns, and if I can find one that appears to have a good mix of live timber pockets and burn scars, I will almost always find elk. The other benefit of a burn is that it can free up water on the landscape, due to the fact that the burned trees are no longer sucking available water. I’ve seen areas, particularly more arid pinyon/juniper country, where after a burn has occurred, seeps and springs have popped up on the landscape once again.
While all burns aren’t magnets for deer and elk, I think newer burns, at elevations where it’s likely to produce good regrowth, and have occurred in more remote areas; those do regularly produce good hunting. Additionally, I’ve noticed over the last 25 years here in southern Utah that the years after a wildfire, the trophy quality has improved significantly for several years. New vegetation is packed with the ingredients to produce bigger antlers. Even before I apply for a hunt each spring, I look at the wildfire layers to help with my application strategy.
Aerial imagery maps are very helpful for identifying bedding and feeding areas and locating water sources. With an aerial map in 3D mode, you can easily evaluate landscapes to look for glassing spots and to understand how to navigate to and from those from access points. Aerial imagery maps are probably the biggest advancement and useful tool for hunting in my lifetime. I also have to admit that, at this point, I’m old; I grew up using topographic maps, and I still think they are very helpful.
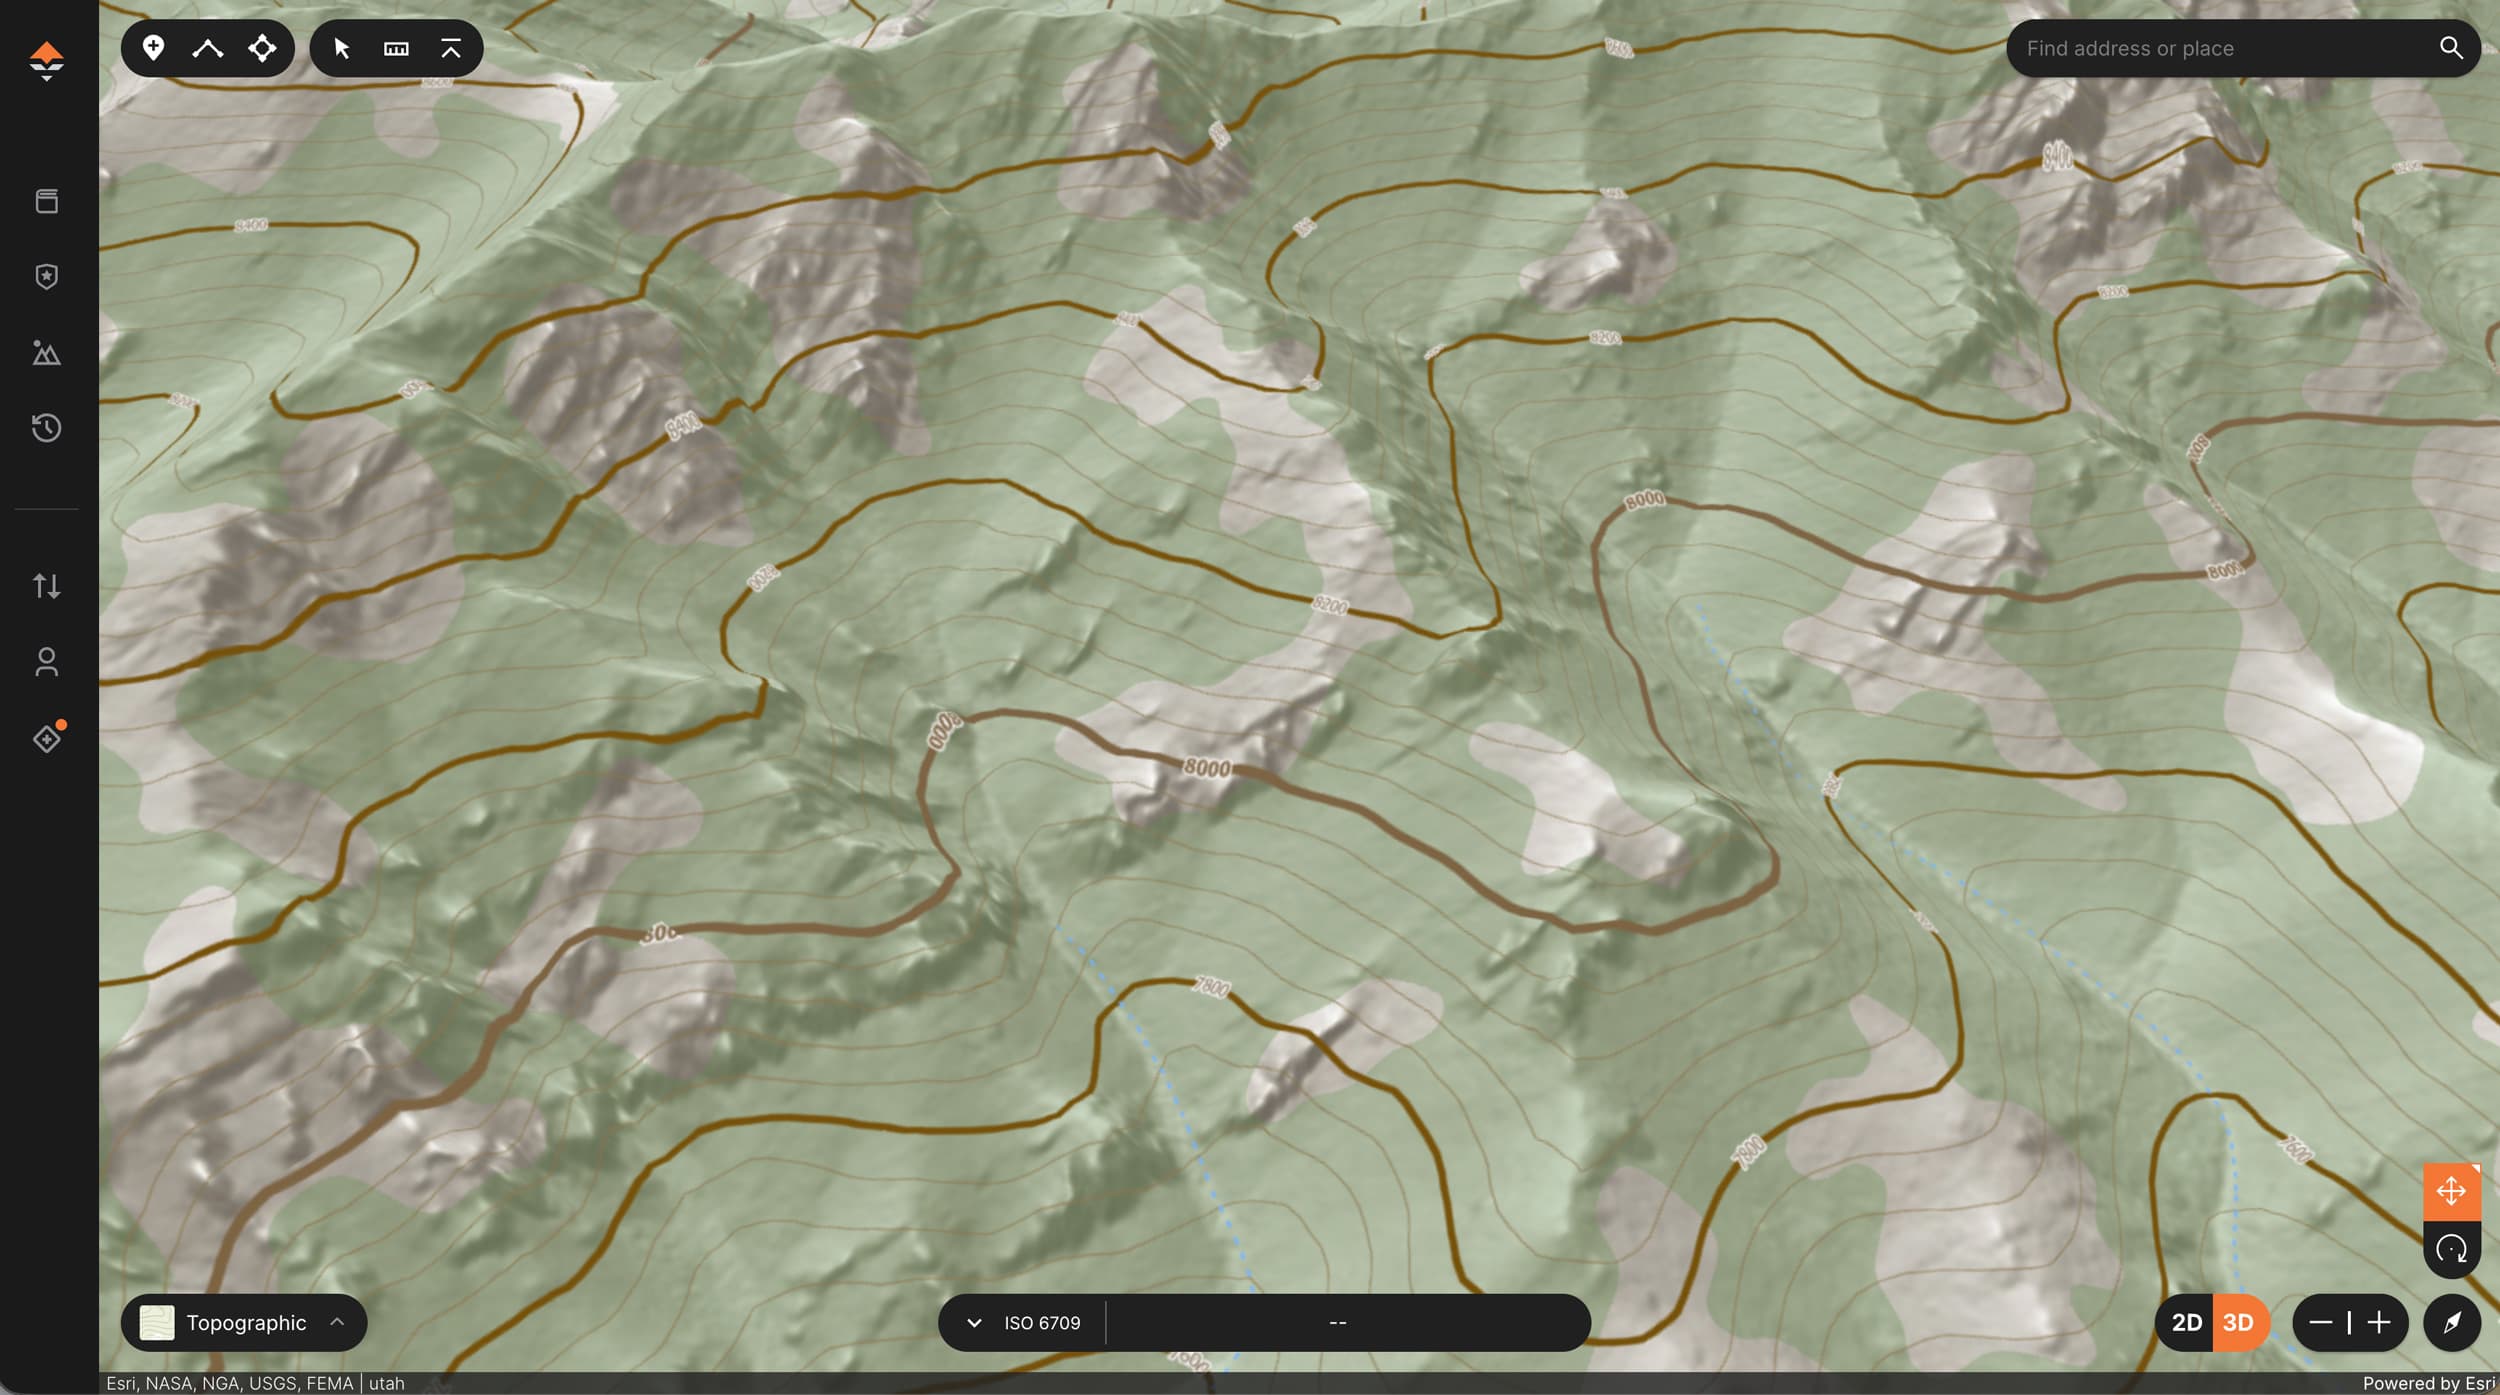
Topographic maps allow me to see the variation in terrain more easily than flat aerial imagery. Saddles that connect two drainages are easily identifiable on a topographic map. Like humans, elk and deer most often use the easiest route to get to a new drainage, and a saddle is a great ambush point. Benches are also easy to see on a topo map. Elk love a flat bench in the middle of a steeper slope to bed, and if that bench has some water, I can almost guarantee there will be elk nearby. Topographic maps also make the high points across the landscape pop out. The peaks and ridgelines are where I start when I am looking for glassing spots. I can then toggle back and forth between aerial image maps and topo maps to see if the glassing spots I’ve picked are open enough to offer me a good line of sight to the best feeding and bedding areas. Don’t overlook topo maps; there is so much information that you can gain from them that you cannot get solely from the aerial imagery.
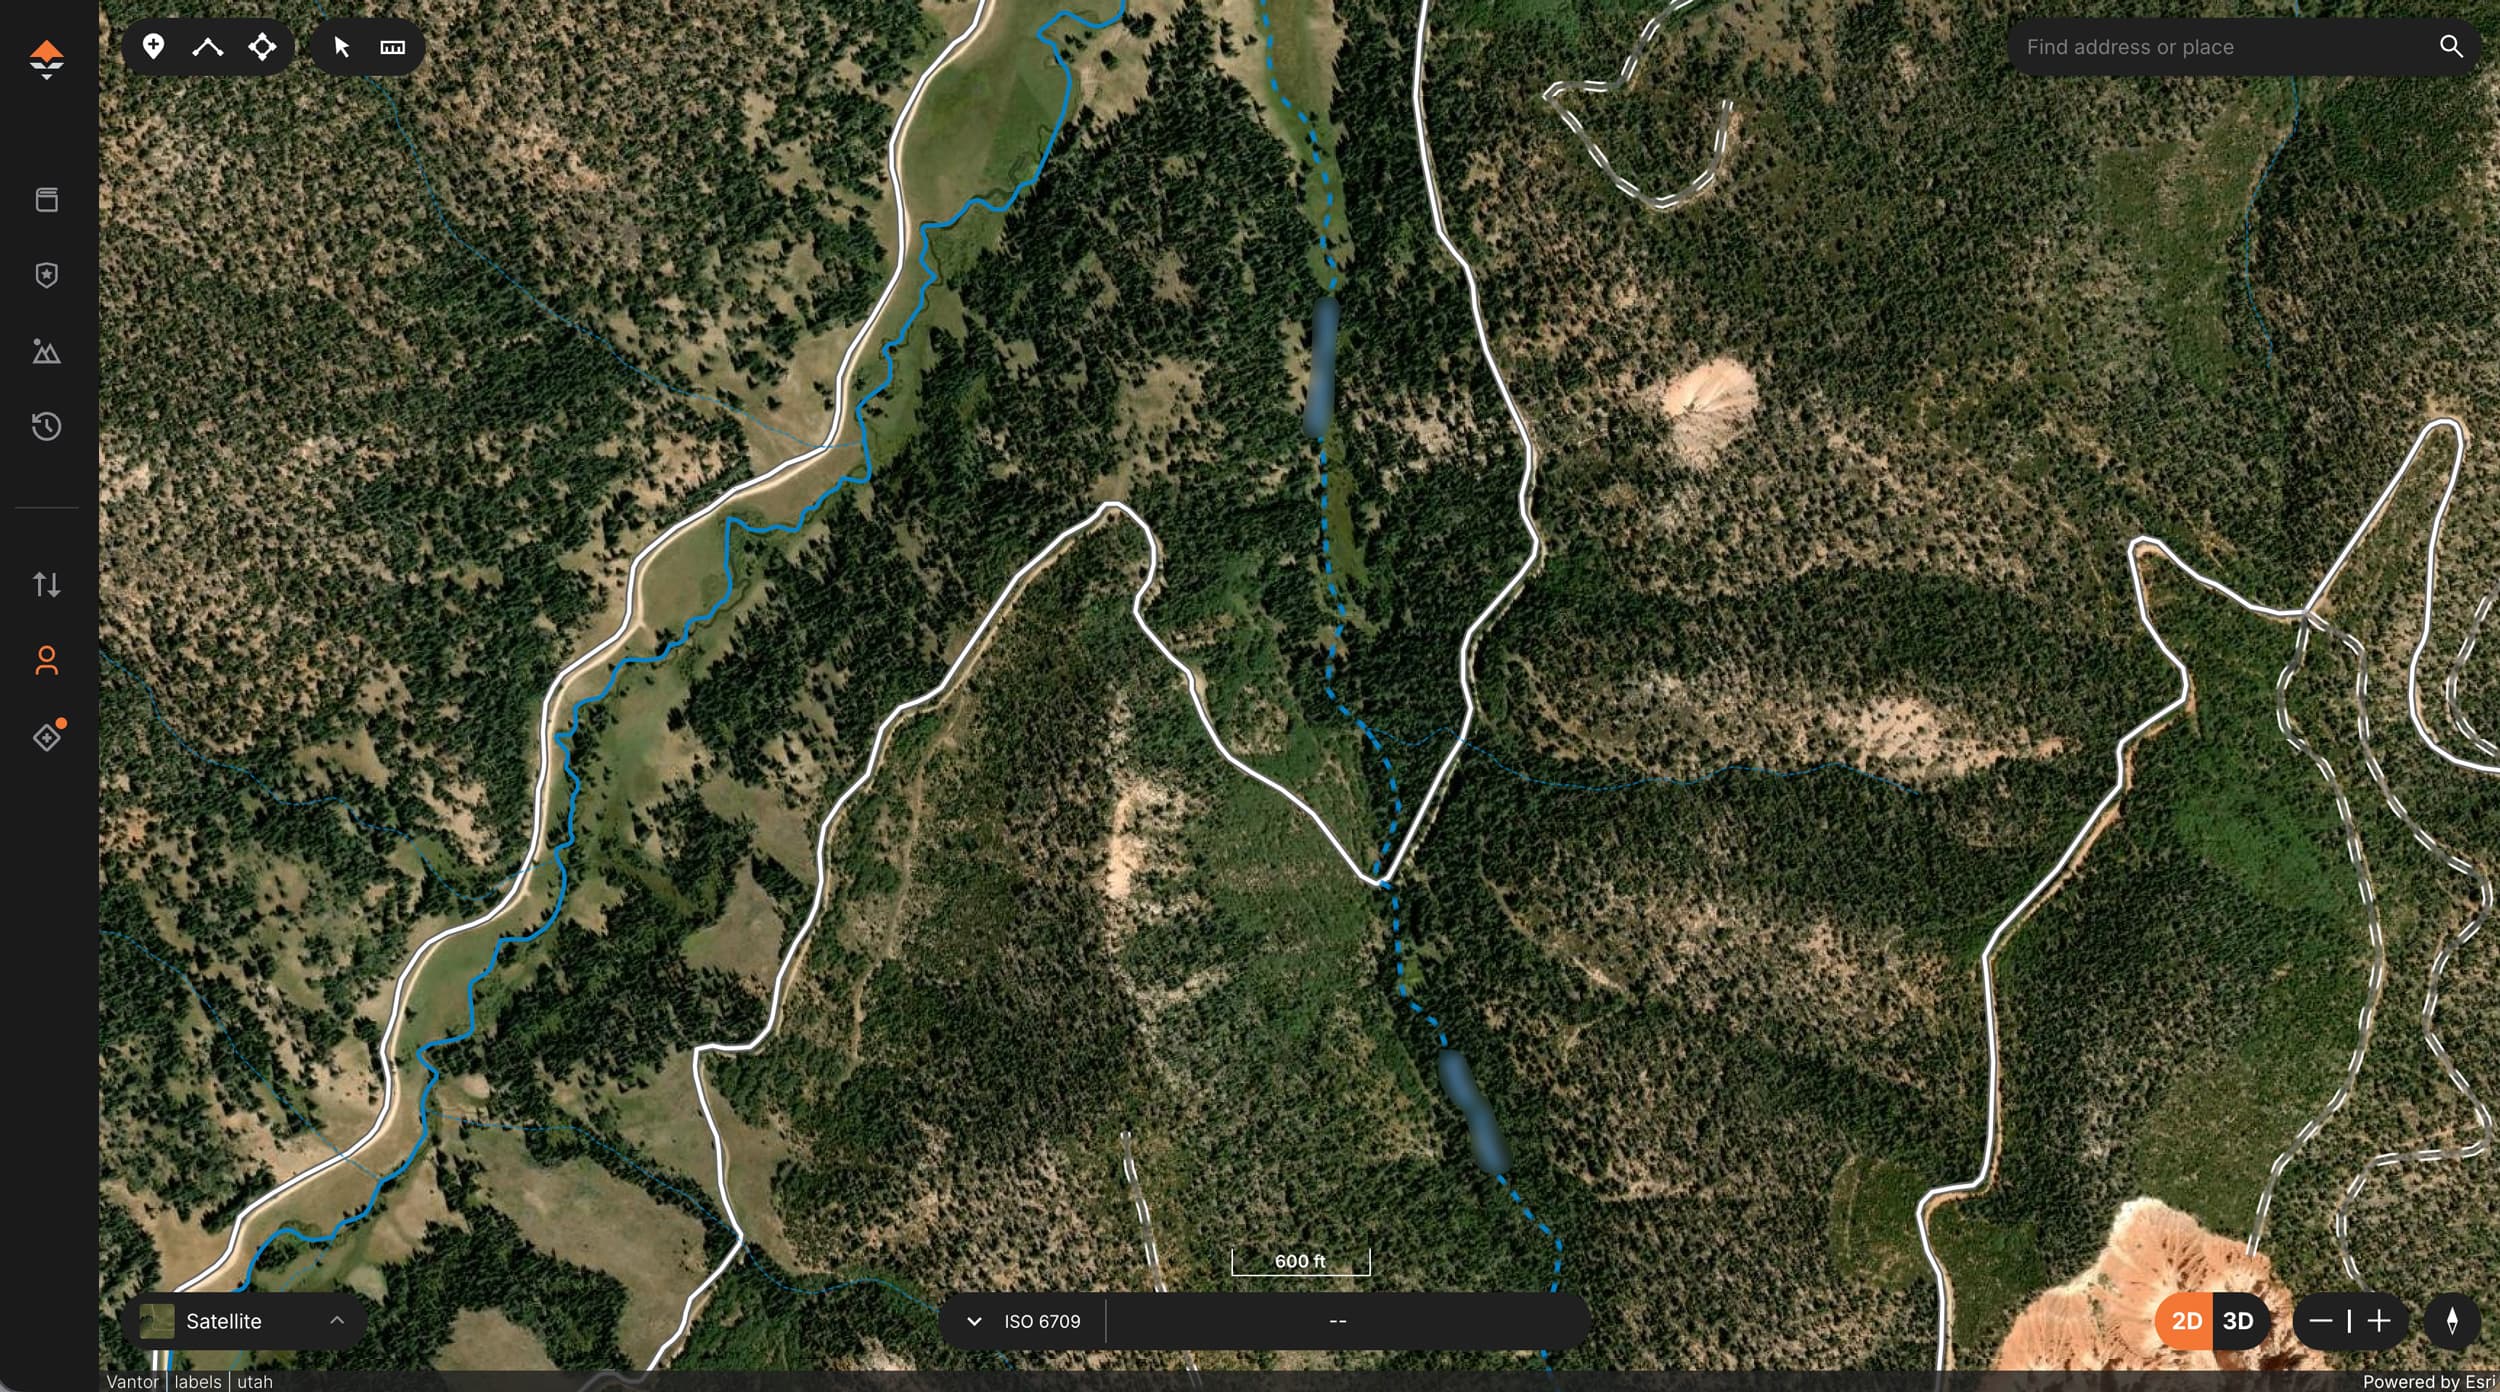
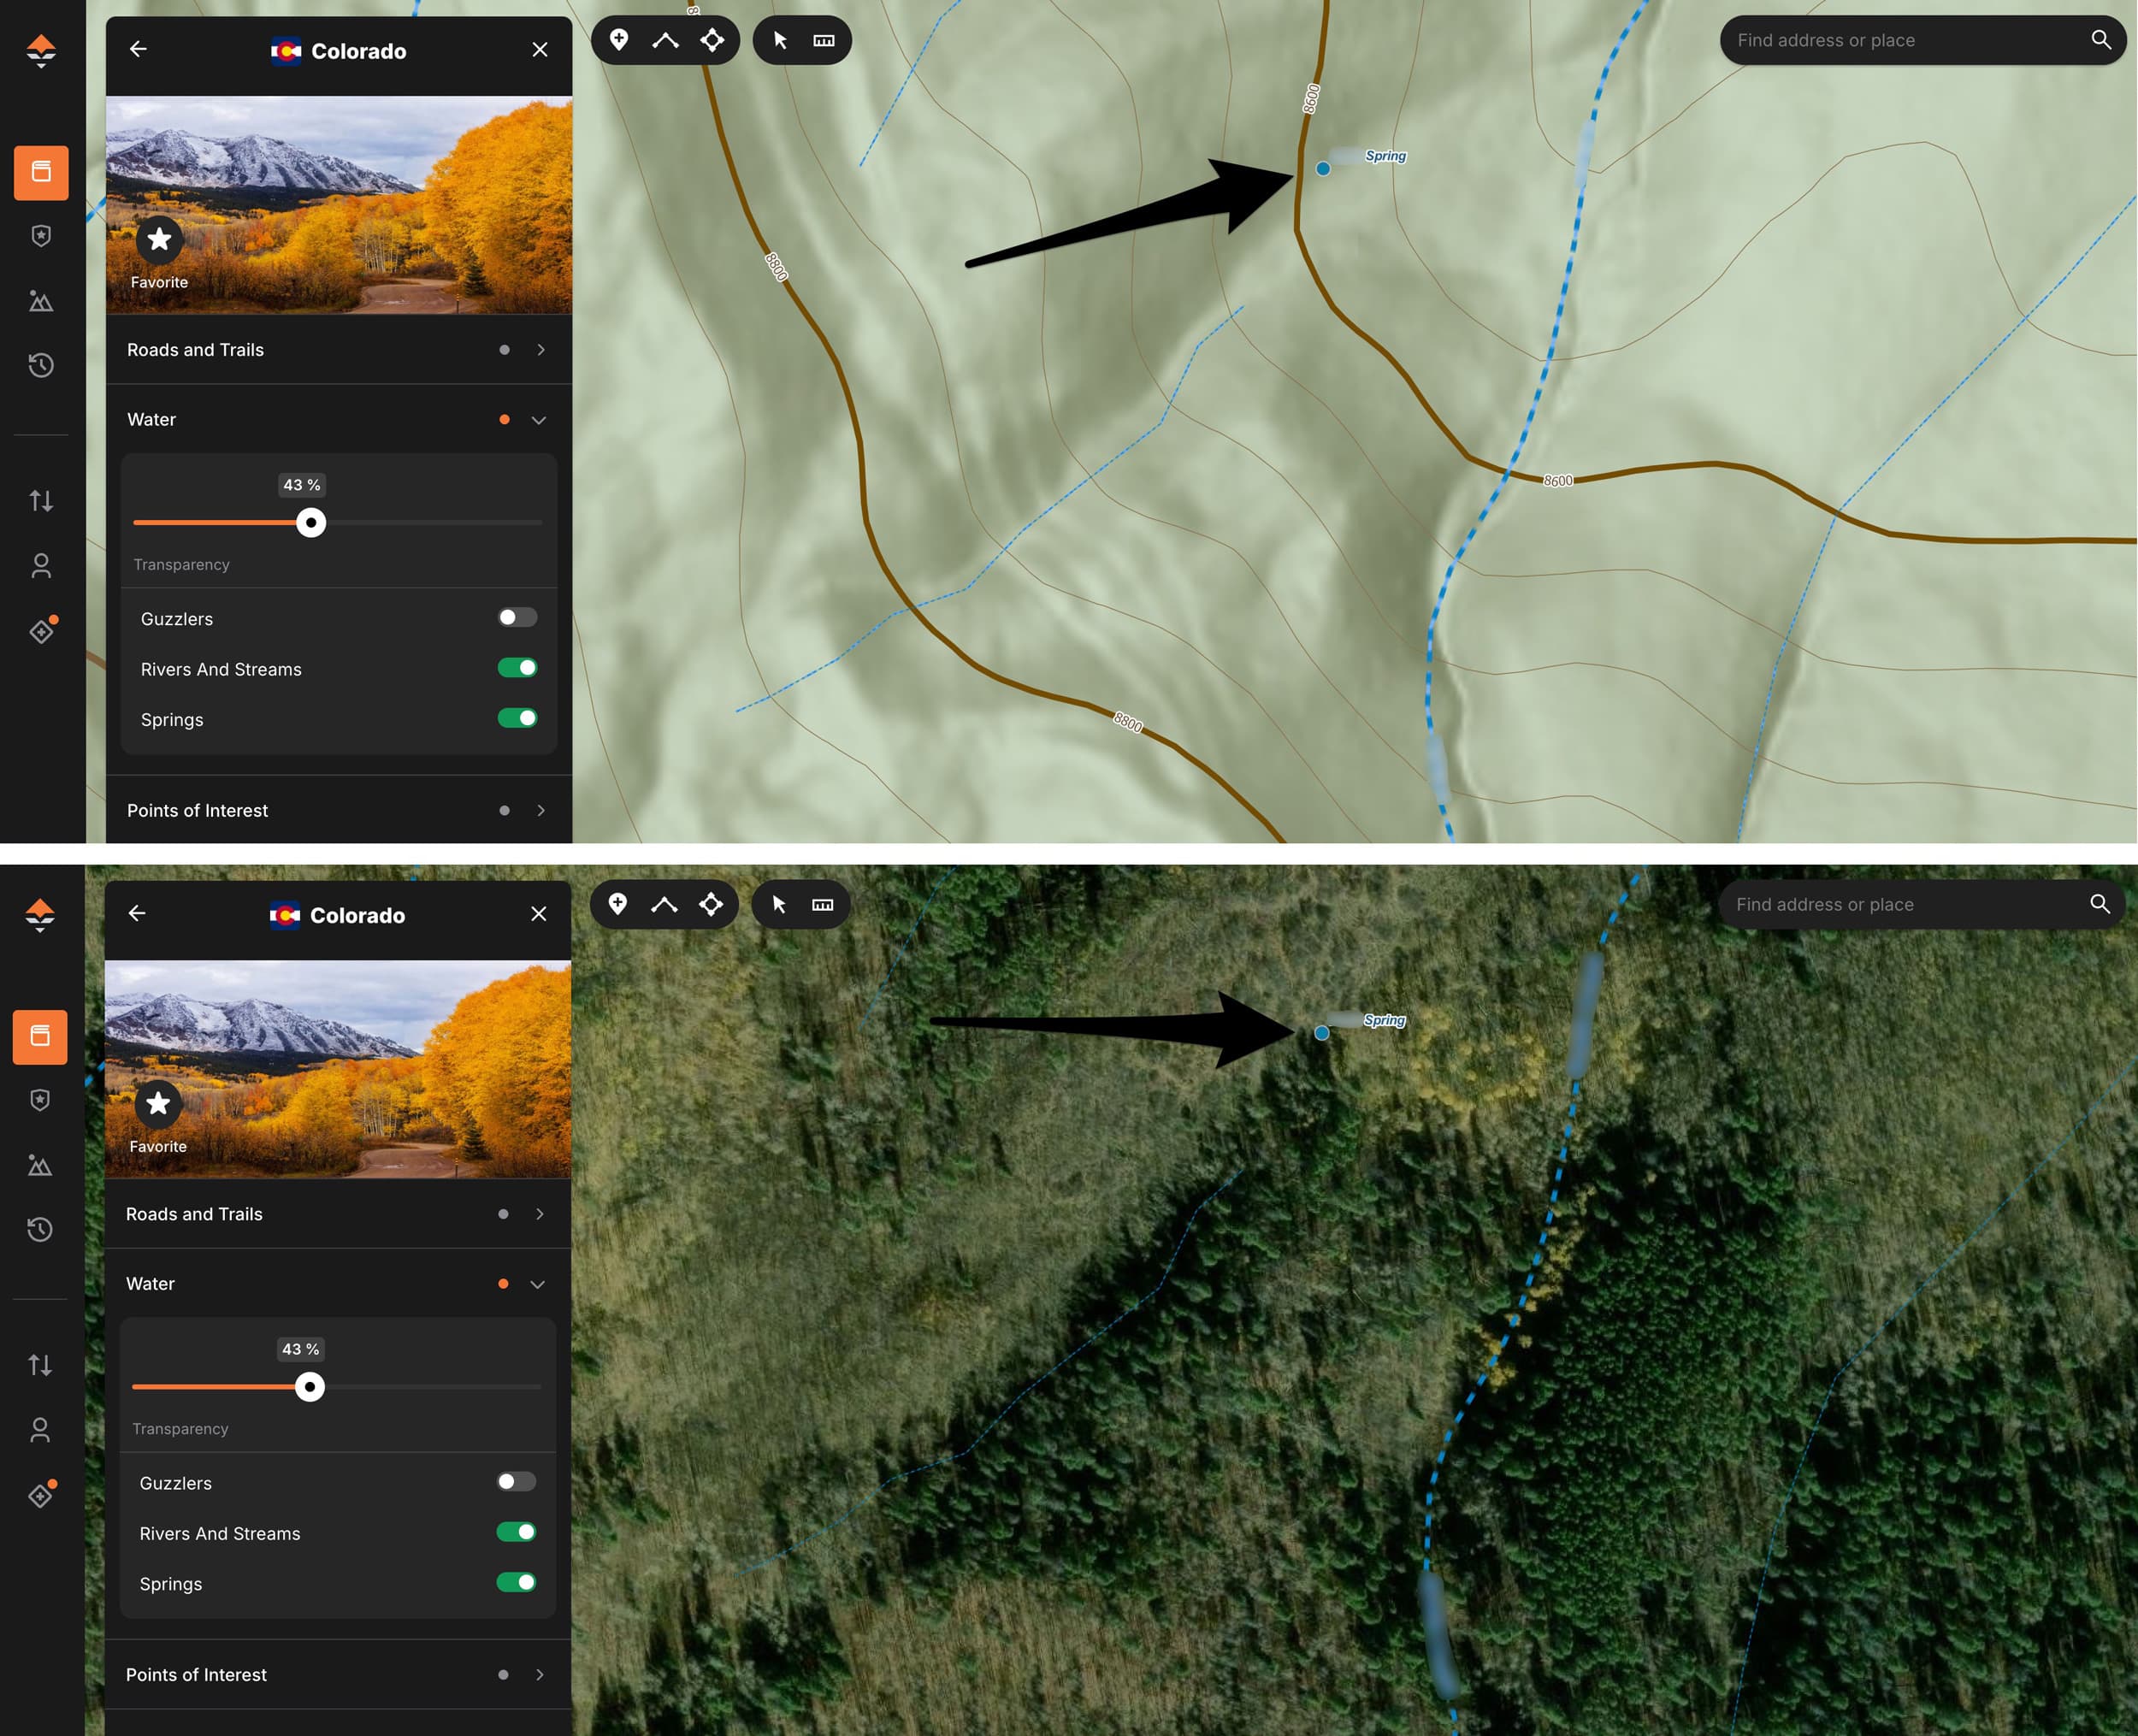
GOHUNT maps have a water layer that you can activate, and within that you can turn on the rivers and springs portion. While not every spring across a landscape will be apparent, I find it useful to see which ones I can identify and further investigate. I can also easily identify the creeks and rivers with that layer. I like to follow those up to the heads of the drainages and zoom in along the way to look for pools, wet meadows, and to see if the creek heads appear to have good standing water. The water layer allows me to look for wet meadows, which are great spots to identify wallows that bull elk use during late August and September. In many cases, you will be able to even identify the wallows if the aerial imagery timeframe offers it.
Another tip regarding water is that I can switch back and forth between the aerial image map and the topographic map to see possible water locations. Topographic maps identify most seeps, springs, and ponds on those maps. By switching back and forth, I can find possible water sources and then check those on the aerial imagery. Elk will water every single day during the early season months. Mule deer are not as reliant on water, but they will still water relatively consistently when the weather is warm. Those riparian corridors are generally cooler and offer good feed. One of the best bucks I have killed was feeding along a wet meadow in the bottom of a drainage I had identified prior to my hunt. Just before shooting light faded, I was able to slip within range and execute a great shot. In my experience, elk and deer will water in a river or a creek, but it seems like they prefer standing water from sources like a seep or spring. I want to know where running water exists on the landscape, but those heads of creeks, springs, and small seeps located near feeding areas and bedding cover are hidden gems.
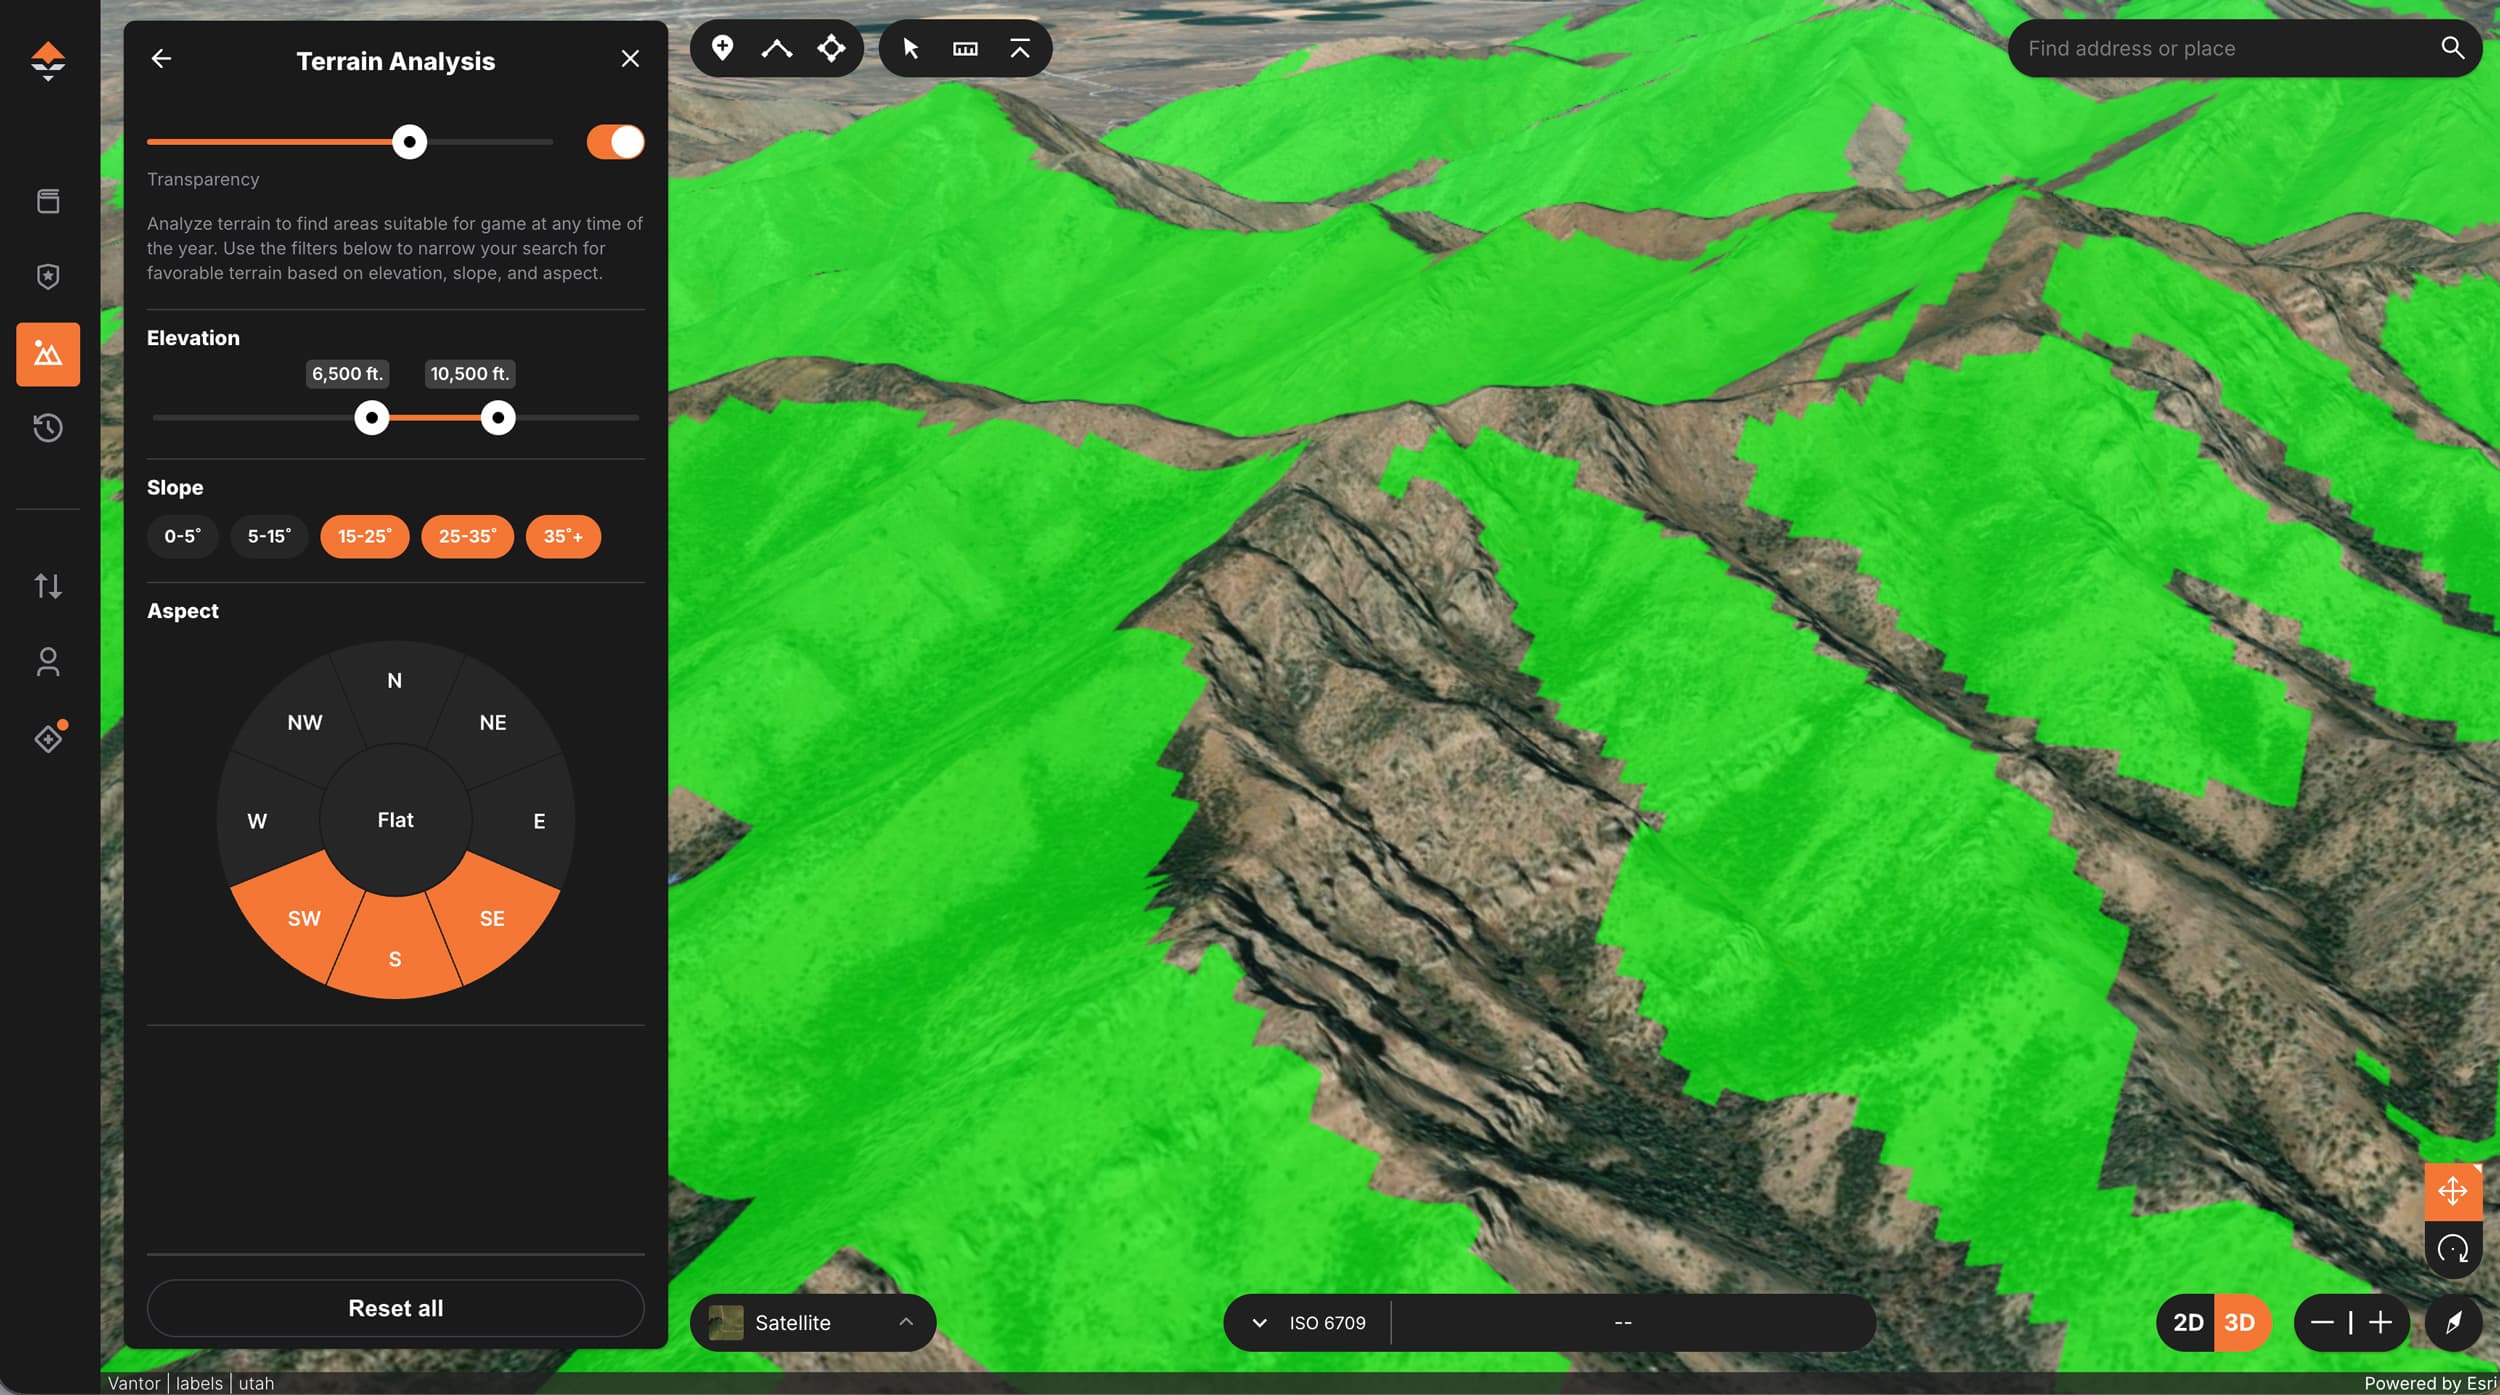
One of my favorite tools in GOHUNT Maps is the Terrain Analysis tool. When you open it up, you can select the aspect, slope, and elevation bands that you are most interested in. For archery elk seasons, I know that elk need shady, cool timbered slopes to thermoregulate. Elk are big animals, and they need to stay cool, so I will highlight the northern and flat aspects. After that, I know that elk like flats and more gentle slopes to bed, so I will highlight the 0-5° and 5-15° slopes first. Lastly, it depends on the area I am hunting in what elevation range I highlight, but with the elevation tool I can highlight elevation bands. If I am hunting a unit where the terrain runs from 6,000 feet up to 11,000 feet, I assume that during that August and September timeframe the elk are going to be higher in elevation. In those cases, I might highlight the 8,000 to 10,000 range. In my experience, elk will mostly be within that elevation window. Primarily, they will be below timberline but within that upper ⅓ just below it. In more arid units they can occupy a wider range of elevations, but I still think it’s worth reviewing those higher elevations within those areas since it will be cooler and the feed is often better. With those steps - aspect, slope, and elevation my map will give me a visual reference of where the best bedding cover occurs across the entire unit.
Mule deer are a different animal, and I use the tool somewhat differently. Mule deer can and do occur from the lower elevations up into the highest alpine basins. They can be spread out across an entire unit. I recently did an exercise where I put waypoints on a map for nine of the best bucks I have killed during the August/September timeframe. I have killed bucks on the low end at around 6,500 feet up to 10,500 feet and everywhere in between. I also took note of the aspect of the slope I killed them on, and surprisingly, I have killed almost all of them on more southerly facing slopes. Brady Miller calls this his "kill location analysis." Learn more about this method through the link below:
Mule deer also seem to handle steeper terrain much better. They can find a small flat spot on a steep slope where they can use their eyes and nose to monitor anything approaching from below and their giant ears to rotate and listen for danger coming from behind. When I use the Terrain Analysis Tool for archery mule deer, I often highlight the 15-25°, 25-35°, and 35° slopes. I can explore the elevations within my unit with that tool as well.
If the unit I am hunting has that true alpine terrain above timberline that I want to hunt, I can identify it quickly by dragging that bar to highlight a range from perhaps 10,000 to 13,000 feet. If I have some time to scout before my hunt starts, I will take note of the elevations where I am seeing the most deer, and I can highlight that range on my map. That allows me to potentially identify new spots across the landscape that will likely hold deer. Lastly, since I went through the exercise of mapping the bucks that I have killed, I have been looking a lot more at the south, southwest, and southeast facing slopes. I think that those faces offer good browse and more open space so the bucks can watch for predators. Additionally, if there are clumps of timber pockets, shrubs, or cliff bands that provide shade for bedding, those slopes are great spots for spot and stalk archery hunting.
It takes a lot of work and effort to kill a buck or bull with your bow. I have been known to say that the bulk of that is done prior to opening day. If I have done it right, when the sun rises on opening day, I have a buck or bull already found and I am actively putting the plan in play to slip in close and kill him. In order to do that, it takes e-scouting and boots-on-the-ground scouting. We still have a few weeks to take those steps, and hopefully something here can help you make it happen. Best of luck!