



Raw shaft - carbon to carbon (no components)

My step by step process for building the perfect sight tape.
Just like setting up your sight, there are several ways to generate a sight tape. Most sight manufacturers provide blank tape and a few sheets with preset sight tapes that you can cut out and attach to your sight with the accompanying yardage locations. The other option is to create your own custom sight tape!
The first way is to put on a blank sight tape (aka blank sticker) and shoot in each distance through trial and error. For example, if I have pins for 20 to 60 yards and I have those sighted in, I can use the dial to move the sight down and shoot my bottom pin in for 70, 80, 90, etc., yards. Once I feel confident in a mark, I use a pen and make a small mark on the blank tape for that yardage and move to the next range. This is time consuming, but works and is verified. Once you shoot in each distance, you can compare your marked up tape to the tapes provided with your sight and apply the tape that matches your marks. This is time consuming; however, it does allow you to verify each of your marks through shooting groups.
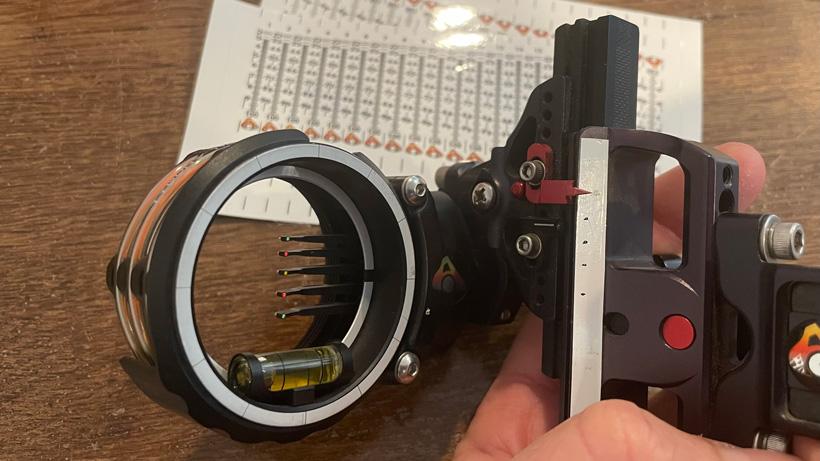
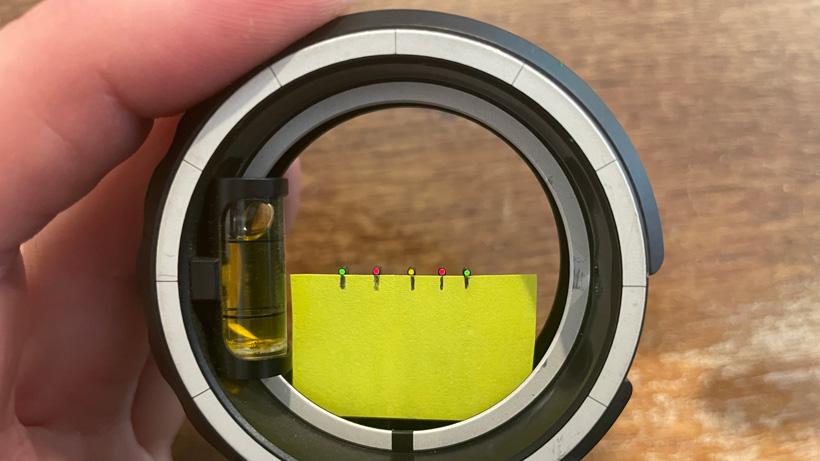
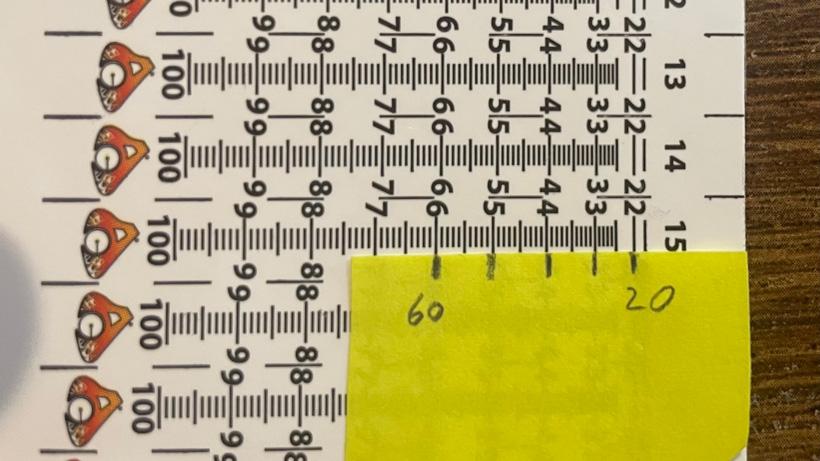
If you shoot a multi-pin slider sight, you can sight in your pins. After your pins are sighted in, take a blank piece of paper and hold it behind your pins (20 to 60) that have been sighted in and make a small pencil mark on the paper next to each pin. Then, take that paper and compare it to the sight tapes provided with your sight. Line up the marks of your pins (20 to 60) with the sight tapes and find the one that fits the best with your marks and apply it. This method can get you close; however, depending on the build of your arrow, you may have some variability at further distance.
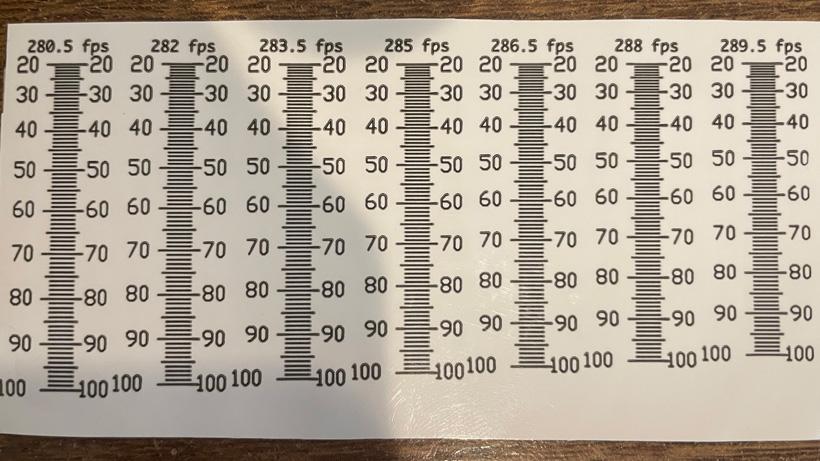
Many sights include tapes that have the Feet Per Second (FPS) labeled with each tape. In this case, you can shoot your bow/arrow combination through a chronograph and compare it to the speed (FPS) indicated on the tapes provided. Select the tape that has the same FPS as your chronograph results and apply that tape. These tapes will be close, but, once again, may not be exact at longer yardages. The way you set your arrow up will impact how it flies at distance. The Front of Center percentage and vane choice/configuration can impact the drop at distance, but the tapes provided are typically close.
This method is much more involved and it will take some time. It does result in a nice product and yields the best results in my opinion. It’s also the best option for single pin sights. You will need to use a program like Archers Advantage, which I recommend. Archers Advantage is great for tinkering with arrow builds as well as allowing you to build custom sight tapes. You can buy a subscription to Archers Advantage for about $12 a year.
Archers Advantage will ask for specific measurements related to your bow, arrow and sight. Archers Advantage is set up so that you can select the equipment you use from their extensive list or, in most cases, you can select “generic” from their drop down menus and enter the exact specs from your components as you weigh them. This is my preferred method.
You will need the following items:
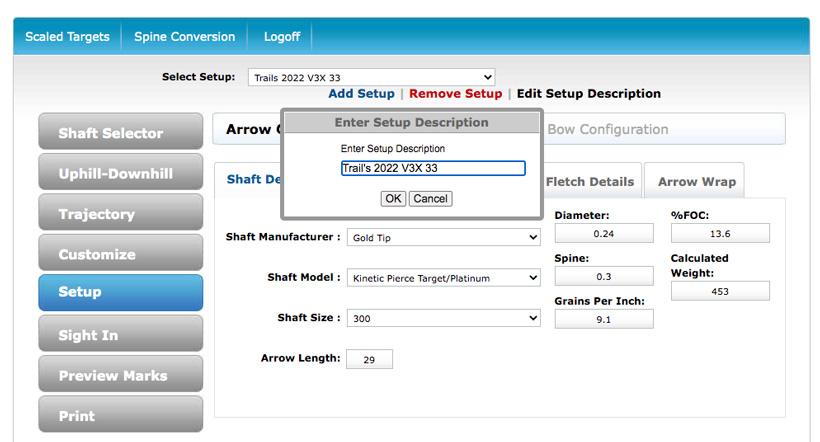
Log into your Archers Advantage account. Select the “Setup” icon. Select the “Add Setup” icon and add the name of the bow you are adding. For this example, I will call this Trail’s 2022 V3X.
Next, select the “Arrow Configuration” link. Within that window, select the shaft manufacturer, shaft model, shaft size and then arrow length.
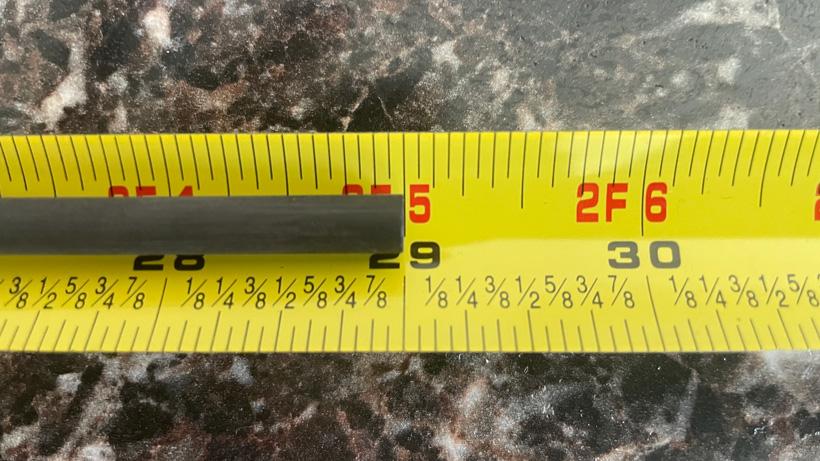
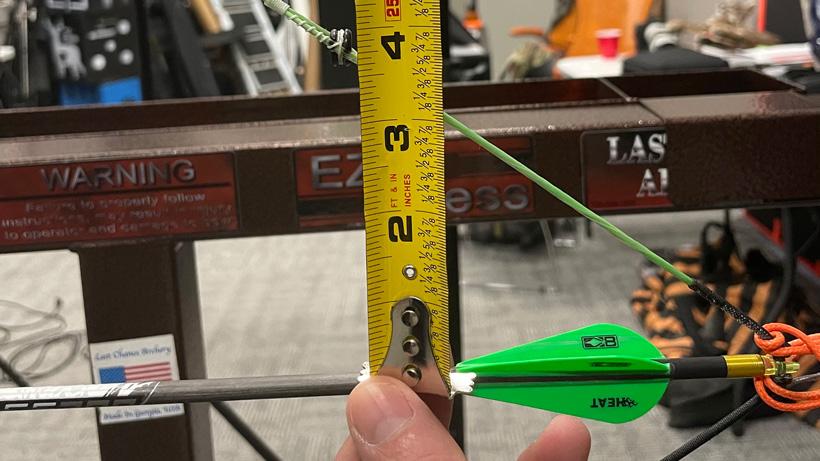
Raw shaft - carbon to carbon (no components)
The arrow length is your measured arrow length from carbon to carbon. Grab an arrow, measure your arrow's length accordingly, and add that measurement.
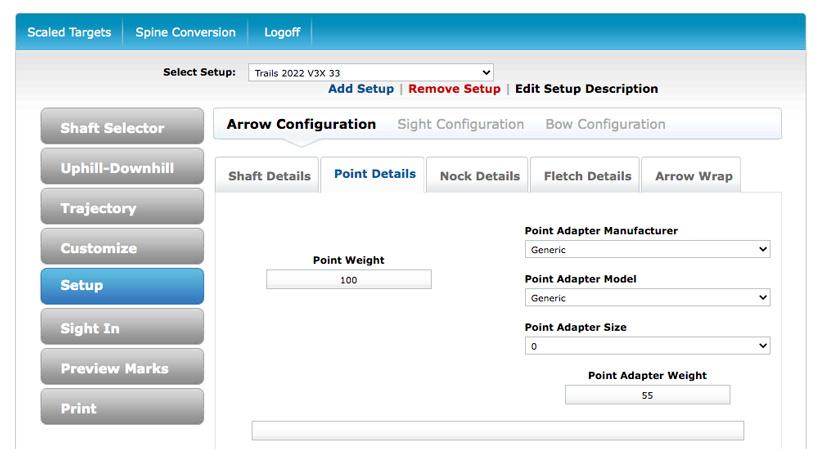
Next, select the “Point Details” link. You can choose components from the dropdown list; however, I prefer to select “generic” from the drop downs, weigh my point weight and adapter weight, and input those manually. For example, I will enter 100 grains for my field tip/broadhead and then weigh the insert component(s). For example, if I am using a 55 grain Easton Half Out Titanium Outsert, I will enter 55 in the point weight adapter weight box.
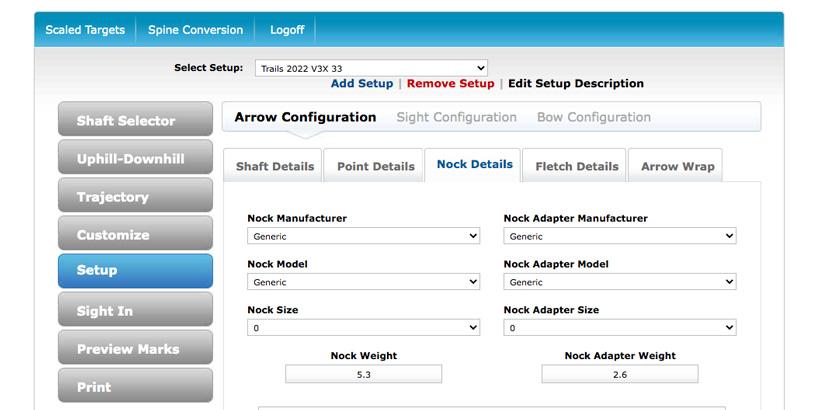
Next, select the “Nock Details” link. Once again, you can select the options you use from the drop down menus or, as I prefer, select “generic” from the drop down. I weigh and input the nock and nock adapter weights into the nock weight and nock adapter weight boxes.
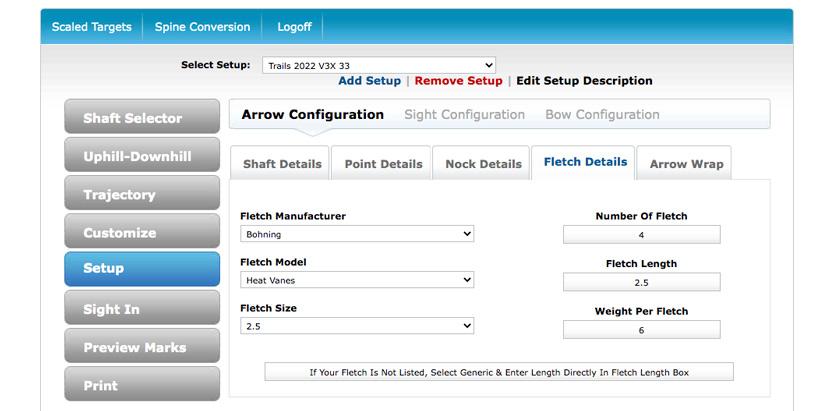
Next, select the “Fletch Details” link. Use the drop down menus to select the fletchings you are using as well as the number of fletchings.
Next, if you use a wrap, select the “Arrow Wrap” link and use the drop down to select your wraps or, once again, add the length and weigh one of your wraps and input that number into the field.
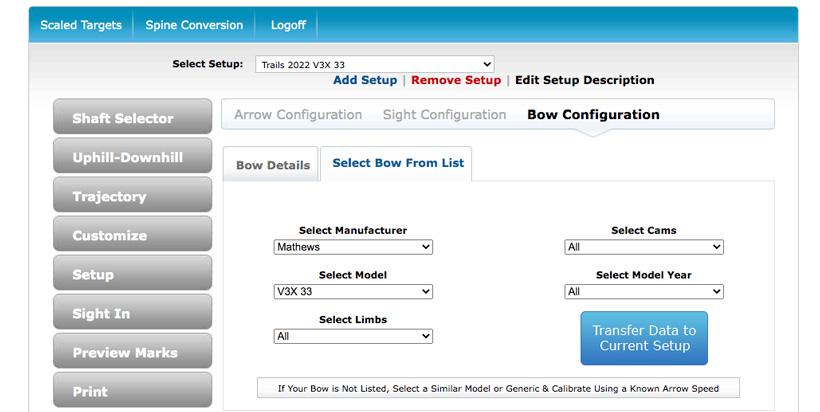
Next, select the “Bow Configuration” icon, then “Select Bow From List.” Select the bow you are setting up. For me, I select Mathews > V3X 33. I then select “Transfer Data to Current Setup.” Next, select “Bow Details.” In this window, you will add your Peak Draw Weight and AMO Draw Length. You will need to use a bow scale to draw your bow and obtain the peak draw weight. Then, input your draw length into the AMO Draw Length section.
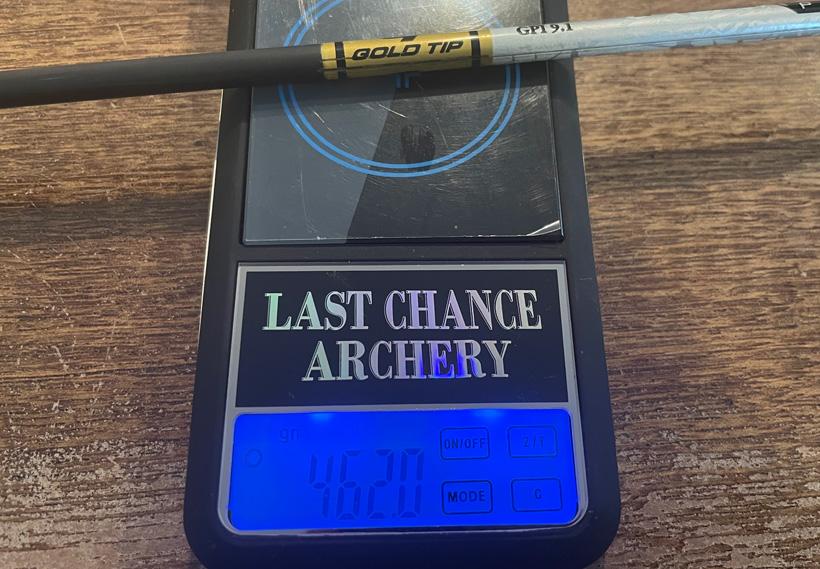
At this point, you have your setup entered into the system and are almost ready to move to the next step. Before you move on, I would suggest that you actually weigh all of your entire finished arrows. I like to open a spreadsheet and weigh and record the weight of each arrow. When complete, I will add those all together and divide that by the total number of arrows I have. That will give me the average weight of my arrows. I then compare that arrow weight to the weight of the arrow as calculated within Archers Advantage. In most cases, you may need to add a few grains in the “Arrow Configuration” portion. For example, glue may add a few grains or a broadhead may be a couple of grains heavier. A recent example: Archers Advantage calculated my finished arrow weight at 455 grains, but the average weight of my finished arrows when I weighed them was 462, so I added 4 grains to the “Nock Adapter” section to account for glue and another 3 grains to the “Point Weight” section to account for the slight difference. That provides the exact arrow weight and best information within the Archers Advantage program.
In step eight, you need to collect some more information to generate the sight tape.
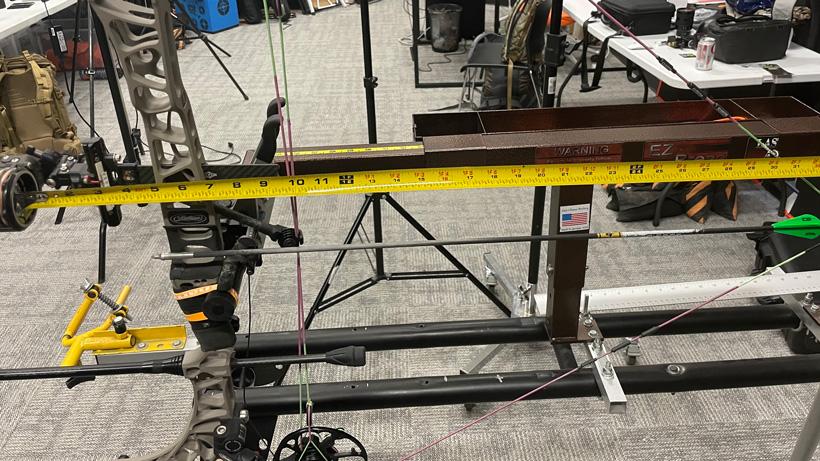
Here is how you collect that. I prefer to use a draw board and digital calipers; however, you can have a friend help you with these at full draw as well.
1.) Peep to arrow:
This is the distance from the center of your peep sight to the center of your arrow at full draw. You can measure from the top of your arrow to the bottom of your peep sight and then add in half the width of your arrow shaft and half the width of your peep.
2.) Peep to pin:
This is the distance from the middle of your peep to your pin. This measurement is also taken at full draw. Record this to the hundredth of an inch. For example, if it’s 29 ⅛ you’ll record that to 29.125
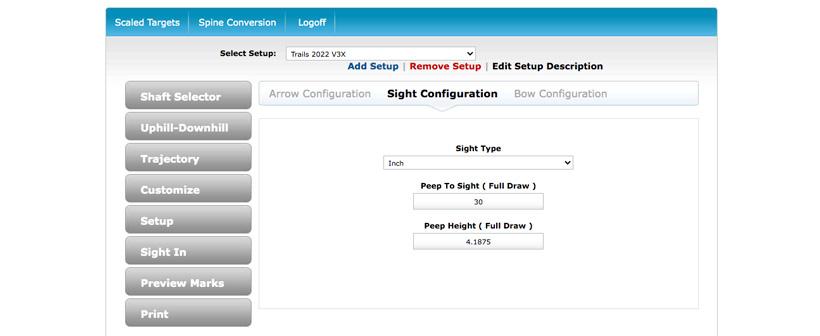
Once again, select the “Setup” link on the left portion of the page. Next, select the “Sight Configuration” tab. Under the “Sight Type” drop down, find your sight. If your sight is not within the list, select the “Inch” option. Then enter your “Peep to Sight” measurement that you took at full draw in Step 8. Then enter the “Peep Height” measurement you took at full draw in Step 8.
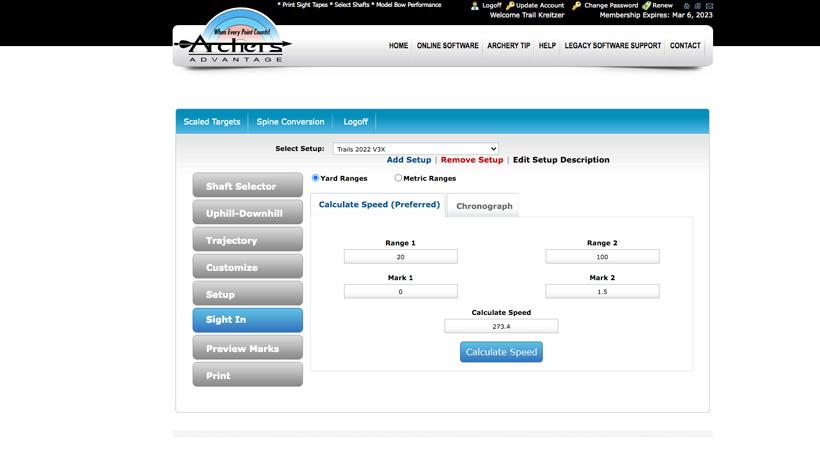
For this step, you will need to do some shooting prior to entering your information. For a five pin sight, my preferred method is to sight in my top pin at 20 yards. I then move the bottom pin and sight that in at 60 yards. I then use the bottom pin and the slider on my sight to move the housing down and sight in that bottom pin at a distance I feel confident in. The farther you can get, the more accurate your tape will be. For me, I slide the sight down and sight the bottom pin in at 100 yards and then make a mark next to the indicator on a blank tape.
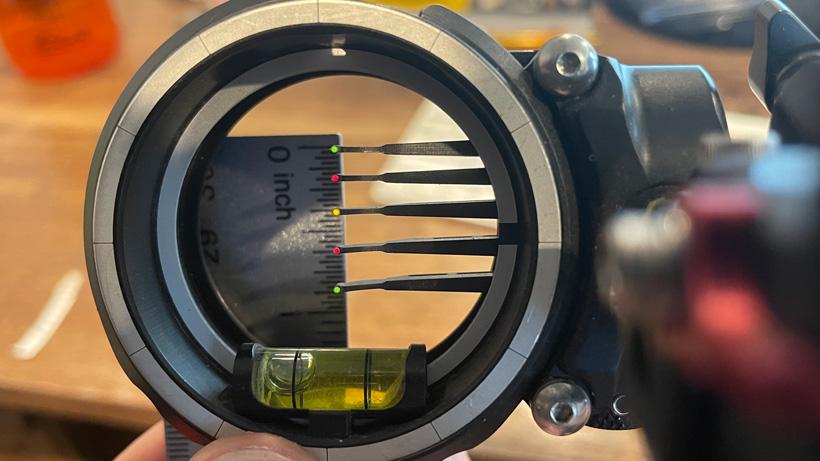
Next, use your digital calipers or a ruler and measure the distance from your top pin to your bottom pin within your housing and write that down. Then, measure the distance from your default mark to the mark that you made for your farthest distance and write that down. Add those two together and enter that number in the “Mark 2” box in Archers Advantage.
The measurement from top pin to bottom pin, as sighted in at 20 and 60 yards.
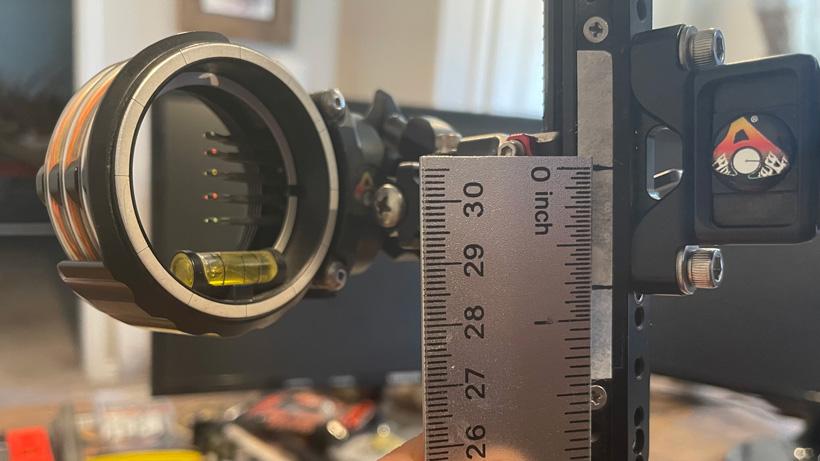
Measurement from your default mark to your 100 yard mark as sighted in. Default mark is where your 20 and 60 yard pins are sighted in and set.
Mark 2 is the number of those two measurements added. Essentially, it’s the measurement between your top pin sighted in at 20 yards and the spot where your 20 yard pin would be if it was sighted in at 100 yards.
For single pin housings, you would sight in your pin at 20 yards and make a default mark on your dial. Then, move your sight housing down with the slider/dial and sight the pin in at the maximum distance that you can for your abilities while still having clearance between your vanes and housing on the shot. Mark that distance on your housing and then measure the distance between your default 20 yard mark and your furthest yardage mark that you made. Now, enter that distance in the Mark 2 box in Archers Advantage and hit the calculate speed button.
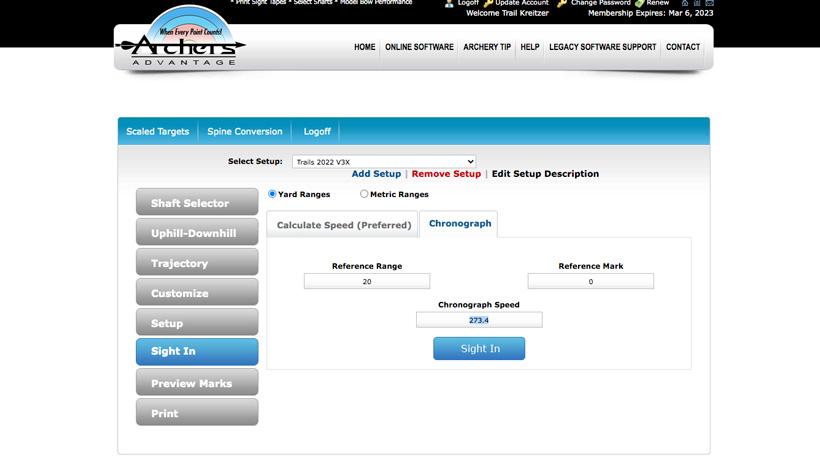
Another much quicker option is to use the “Chronograph” option. If you click on that tab there will be a FPS displayed that has been calculated by the program. You can leave that, but it’s not going to be as accurate as the FPS you get from shooting your setup through a chronograph. For that reason, I recommend shooting a number of arrows through a chronograph, taking the average FPS and entering that within that field in the program.
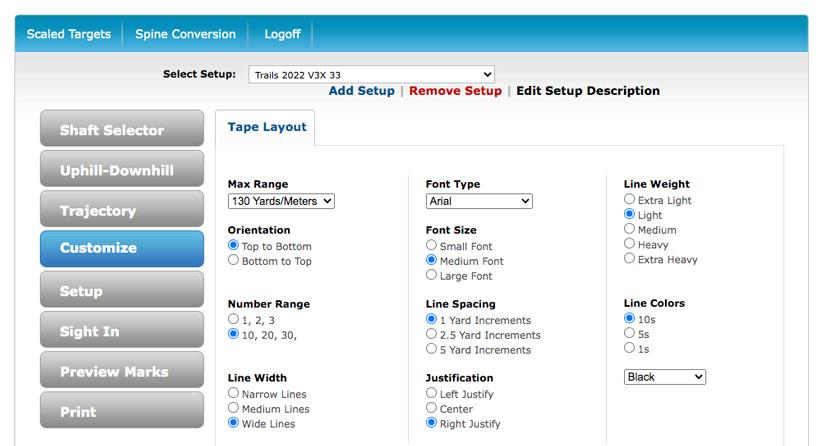
Select the “Customize” tab from the left portion of the screen. You can then use the field to set your tape up to your personal preference.
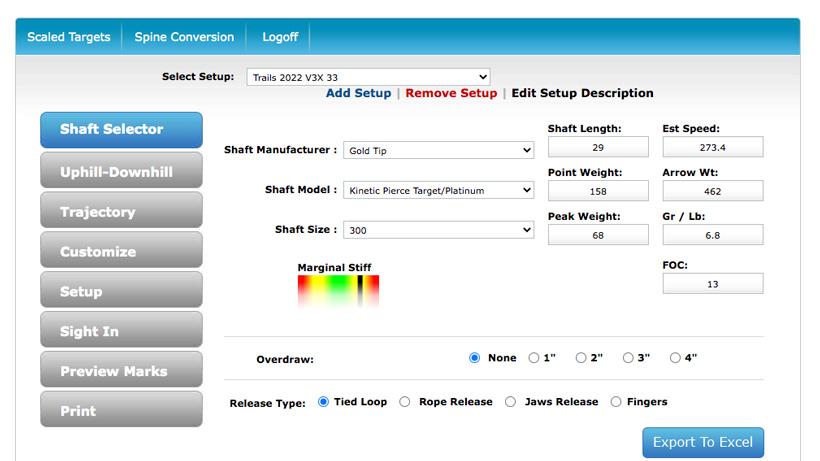
Now that you have entered all of your information, double check its accuracy. Click on the “Shaft Selector” tab on the left and you can see your setup as well as a color coded graphics that will display how well your arrow/bow combo matches. For mechanical broadhead and field tips, you ultimately want the indicator in the green portion. For a fixed blade head, the indicator in the green or slightly too stiff is ideal. Make sure within this screen that you also have the “Tied Loop” selected if you shoot a D-loop, which most people do.
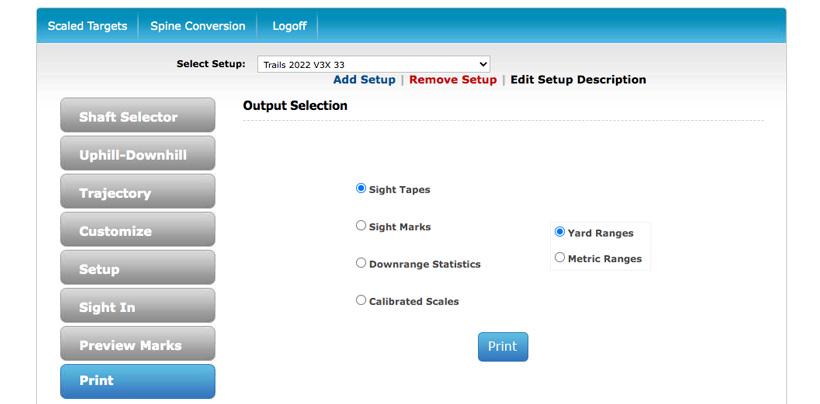
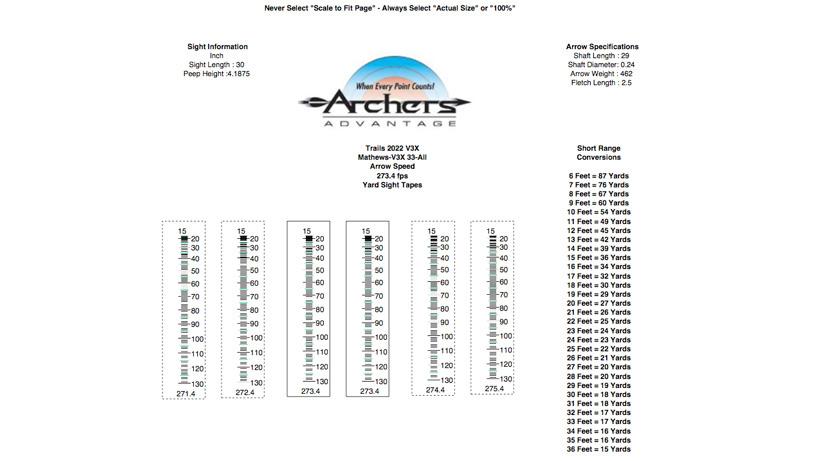
The last step is to select the “Print” tab on the left. Within that window, select the “Sight Tapes” indicator and the “Yard Ranges” indicator. Then select PRINT! Make sure that when you print your tapes that you do not select the "Scale to Fit Page." Always Select "Actual Size" or "100%." That will generate sight tapes for your customized bow/arrow combo. You will see that it generates six total tapes, two of which at your FPS entered and then two that are 1 FPS slower and two that are 1 FPS faster.
I then cut out the sight tape for my setup and with some scissors or a razor knife, you can cut out the tape for your sight. I prefer to take the tape and put it on an arrow wrap where I will take some fletching glue and glue the tape to the arrow wrap. After the glue has dried, I like to then cover that with some clear packing tape. I then cut the tape, peel the backing for the arrow wrap and apply that to my sight.
Bow
Finished arrow
Arrow components for your arrow for precise weight
Archers Advantage online subscription (basic level is $12/annually)
Tape measure (digital calipers are nice as well)
Scale (grains, for example, Last Chance Archery Pro Grain Scale)
Bow scale (measures draw weight)
Draw board (not necessary, but very handy; a friend can help instead)
Chronograph (not necessary, but recommended)
Maximum range: This simply refers to how many yards the tape will read out to. In my experience, most bows will not have sight clearance past 110 yards with some reaching 130 yards on the extreme end. I like to leave this set at 130 yards because it will give me the longest tape to work with.
Orientation: This changes whether the ranges start from the top down or the bottom up. Most sights will generally start from the top down; however, some may start from the bottom up. It is important to check with the manufacturer if you are unsure.
Number range: This will change whether you want the tape to read out every yard (1, 2, 3, 4, etc.) or read in ten yard increments. In the interest of not having a jumbled up mess, I always select the 10 yard increment option.
Line width: This dictates how far the yardage lines will extend horizontally from the range numbers. I like to leave this on wide as it will give me the biggest surface area for my indicator pin to cover, which leads to more precise dialing at longer distances.
Font size: This will merely change the size of the range numbers. I generally go with medium as I can see the numbers easily and this will make for easy adjustments in the field. Some experimenting may need to be done here as larger numbers means a bigger tape and you may have issues getting the tape to fit properly on the sight.
Line spacing: This will control the black lines found between the major yardage markers (green and blue in the example). Again, this will take some playing to get your desired effect. Faster bows will lead to closer lines which can appear crowded and messy at shorter distances. I prefer 1 yard increments as this will allow more precise dialing, specifically for long distances.
Justification: This will be determined entirely by your sight and its design. By changing the justification, the numbers will appear to the left of the scale, right of the scale or on both sides of the scale.
Line weight: This refers to the thickness of your yardage marks. As with the other options, this will take some experimenting to find the right combo for your setup. I prefer the “light” setting as this will give me small and easy to read lines that are still heavy enough that it doesn’t take much effort to read while in the field. As line size is increased, the tape will become more crowded.
Line color: This one is fairly self-explanatory. Personally, I prefer to set my 10 yard ranges in black, the 5 yard lines in green and the 1 yard mark in black. Experiment with the colors to see what works best for you.