


Units | 1 |
|---|---|
1/2 inch | .50 |
1/4 inch | .25 |
1/8 inch | .125 |
1/16 inch | .0625 |
Units | 2 |
1/2 inch | 1.0 |
1/4 inch | .50 |
1/8 inch | .250 |
1/16 inch | .1250 |
Units | 3 |
1/2 inch | - |
1/4 inch | .75 |
1/8 inch | .375 |
1/16 inch | .1875 |
Units | 4 |
1/2 inch | - |
1/4 inch | 1.0 |
1/8 inch | .500 |
1/16 inch | .2500 |
Units | 5 |
1/2 inch | - |
1/4 inch | - |
1/8 inch | .625 |
1/16 inch | .3125 |
Units | 6 |
1/2 inch | - |
1/4 inch | - |
1/8 inch | .750 |
1/16 inch | .3750 |
Units | 7 |
1/2 inch | - |
1/4 inch | - |
1/8 inch | .875 |
1/16 inch | .4375 |
Units | 8 |
1/2 inch | - |
1/4 inch | - |
1/8 inch | 1.00 |
1/16 inch | .5000 |
Units | 9 |
1/2 inch | - |
1/4 inch | - |
1/8 inch | - |
1/16 inch | .5625 |
Units | 10 |
1/2 inch | - |
1/4 inch | - |
1/8 inch | - |
1/16 inch | .6250 |
Units | 11 |
1/2 inch | - |
1/4 inch | - |
1/8 inch | - |
1/16 inch | .6875 |
Units | 12 |
1/2 inch | - |
1/4 inch | - |
1/8 inch | - |
1/16 inch | .7500 |
Units | 13 |
1/2 inch | - |
1/4 inch | - |
1/8 inch | - |
1/16 inch | .8215 |
Units | 14 |
1/2 inch | - |
1/4 inch | - |
1/8 inch | - |
1/16 inch | .8750 |
Units | 15 |
1/2 inch | - |
1/4 inch | - |
1/8 inch | - |
1/16 inch | .9370 |
Units | 16 |
1/2 inch | - |
1/4 inch | - |
1/8 inch | - |
1/16 inch | 1.000 |
Units | 1/2 inch | 1/4 inch | 1/8 inch | 1/16 inch |
|---|---|---|---|---|
1 | .50 | .25 | .125 | .0625 |
2 | 1.0 | .50 | .250 | .1250 |
3 | - | .75 | .375 | .1875 |
4 | - | 1.0 | .500 | .2500 |
5 | - | - | .625 | .3125 |
6 | - | - | .750 | .3750 |
7 | - | - | .875 | .4375 |
8 | - | - | 1.00 | .5000 |
9 | - | - | - | .5625 |
10 | - | - | - | .6250 |
11 | - | - | - | .6875 |
12 | - | - | - | .7500 |
13 | - | - | - | .8215 |
14 | - | - | - | .8750 |
15 | - | - | - | .9370 |
16 | - | - | - | 1.000 |


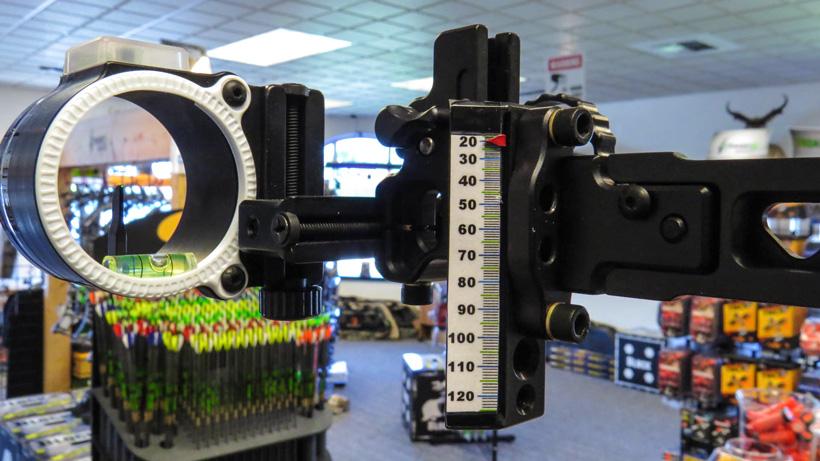
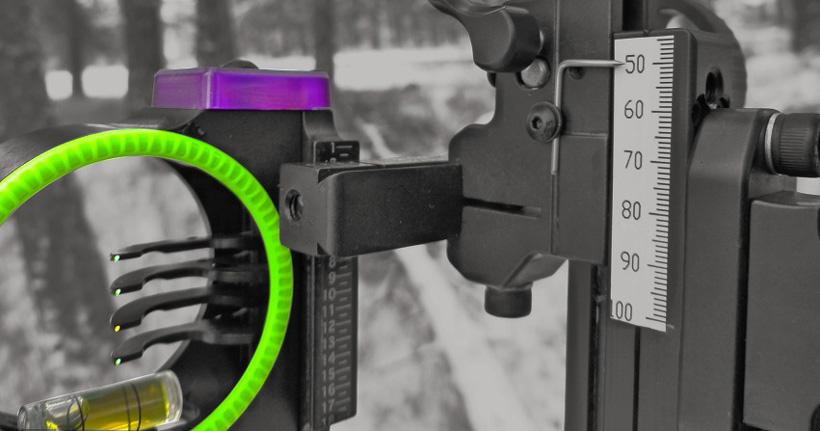
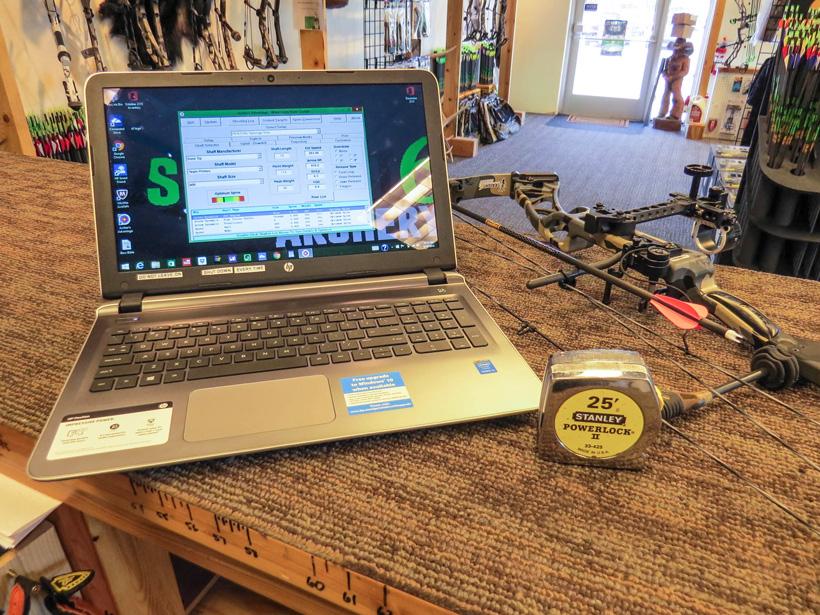
This is the time of the year that bowhunters live for. No, it’s not hunting season yet, but by now most of the western states’ tags have been drawn, winter gear purchases have been made, scouting is on the horizon, and it’s time to get our bows dialed in. In recent years, moving or sliding sights have become increasingly popular and since many companies now offer multi-pin moving options, many hunters are moving into this realm with their hunting setups.
The basis of these moving sights includes proper installation, leveling, and tape building. As the general manager for Straight 6 Archery in Montana, I sell and set up many of these sights every year. I wanted to provide some insight into the options available as well how to actually build a tape for your bow.
The materials needed for building a proper sight tape are very basic. You will need the following:
The biggest decision will be deciding on which computer program to use. Not only can these be somewhat costly but there are several programs to choose from. If you have several buddies who are also looking to build tapes the cost of the program can be split up amongst the group and some programs will even allow online access. Generally speaking, all of the programs are easy to use and will provide excellent results. Some of the available options are:
Some free programs are also available but will require the use of target sights with readable “clicks” located on the adjustment scale (most hunting sights will not fall in this category). Some new phone apps are also available, but are generally only accurate up to 60 to 80 yards.
As I’ve stated before, many options are available for archers looking to build sight tapes and for the purpose of this article I will be using Archer's Advantage. This is a program I have used for many years with great success and trust with my equipment and my customers.
The first step is fairly straightforward. Simply locate the Archer’s Advantage icon (or whichever program you’ve decided to use) on the desktop and double click it to open the program. Archers Advantage is also available online.
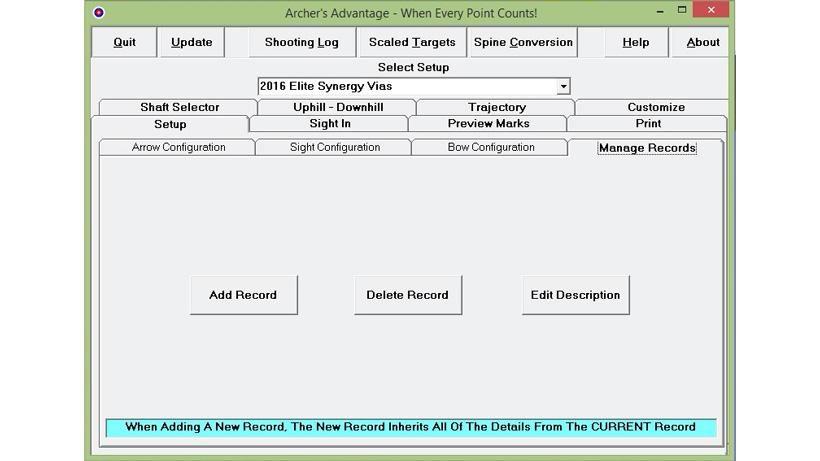
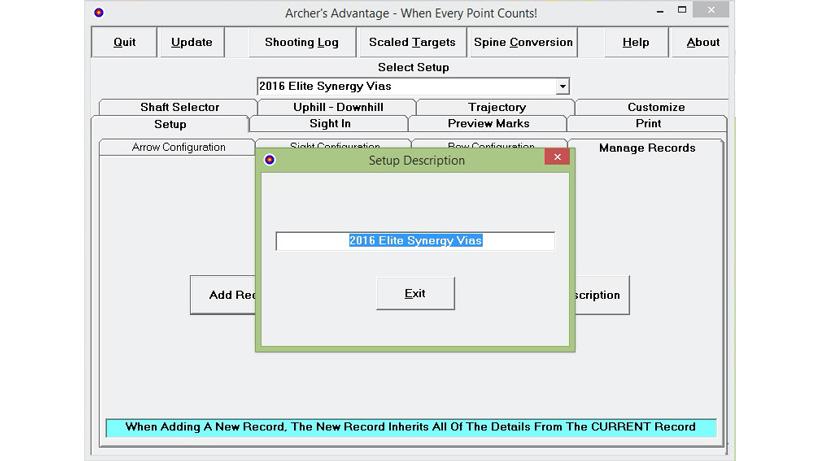
Once the program has fully loaded click on “Setup” and then “Manage Records.” This tab will allow you to enter custom information to name the setup you are working on (e.g., 2016 Elite Synergy Vias).
To do this, click on “Add record” and simply type in the name or model of your bow.
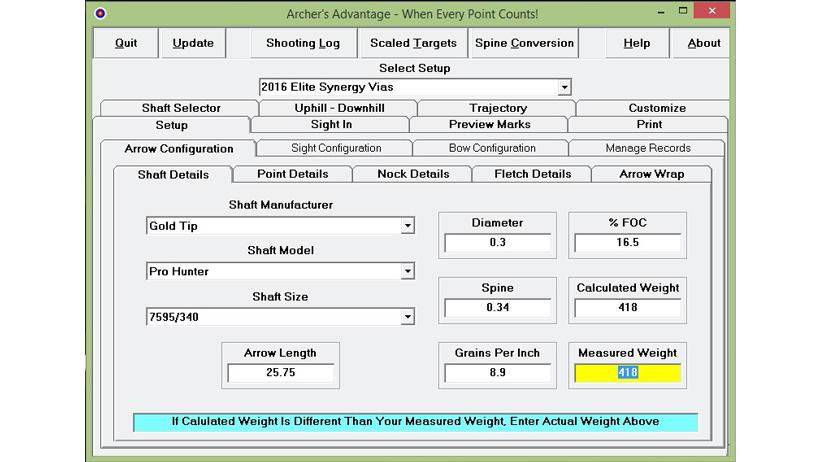
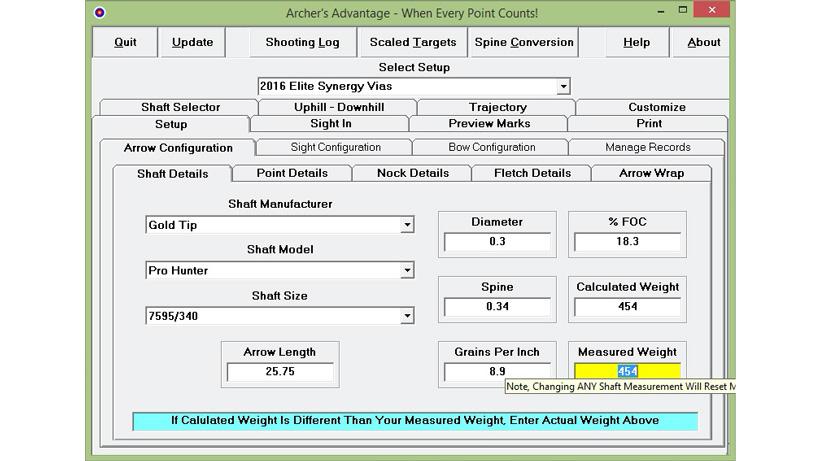
Now we can begin inputting our bow and arrow data into the program. From the “Manage Records” tabs move over to the “Arrow Configuration” tab and select “Shaft Details.” In the shaft details tab you will enter vital information on your arrow, most of which can be done on drop down menus which will autofill remaining info such as spine and diameter:
At this point, your calculated and measured weight may or may not be accurate. As more information is entered into the remaining tabs, these numbers will change. Double-check all of the entered information before moving on. If your specific shaft is not found, it may be necessary to select “generic” in the shaft manufacturer menu and then enter by hand all of the information including shaft diameter, spine and grains per inch.
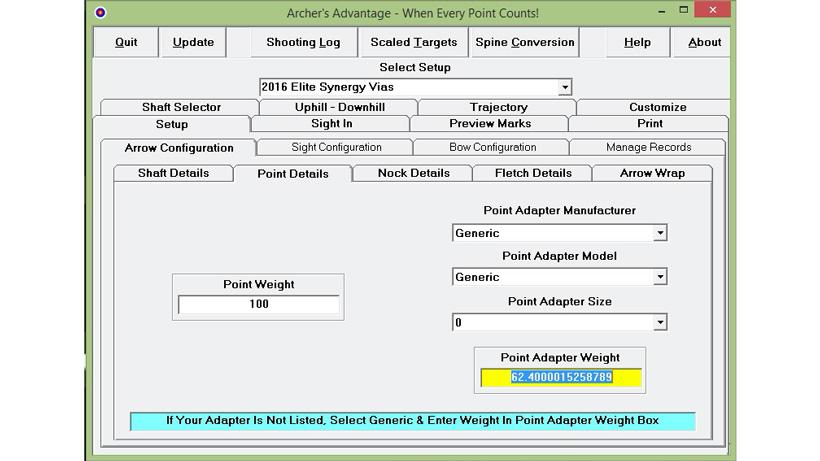
After all of the information for arrow shaft has been entered you can now navigate to the the “Point Detail” tab still found under the “Arrow Configuration” main tab. From here you can now enter vital information on the point.
At this point, the point adapter model will generally autofill. If you are using special insert setups such as Gold Tip F.A.C.T weights or anything else not found in the drop down menus it will be necessary to select “generic” from the first drop down menu and enter the information by hand. For this example, I am using standard .246” series Gold Tip inserts with a 50 grain F.A.C.T insert weight on the back for a total weight of 62.4 grains.
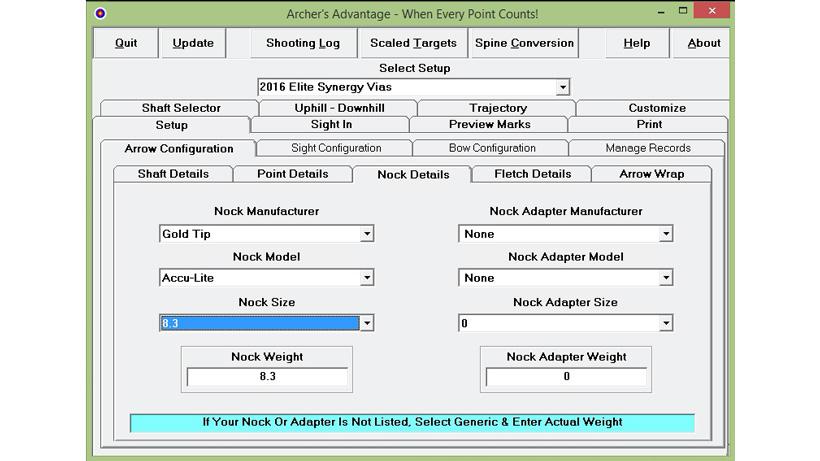
After you have completed entering your insert information, navigate to the “Nock Details” tab.
At this point the nock size and weight will autofill. As always, if the nocks you are using are not present you can select generic and enter your information by hand.
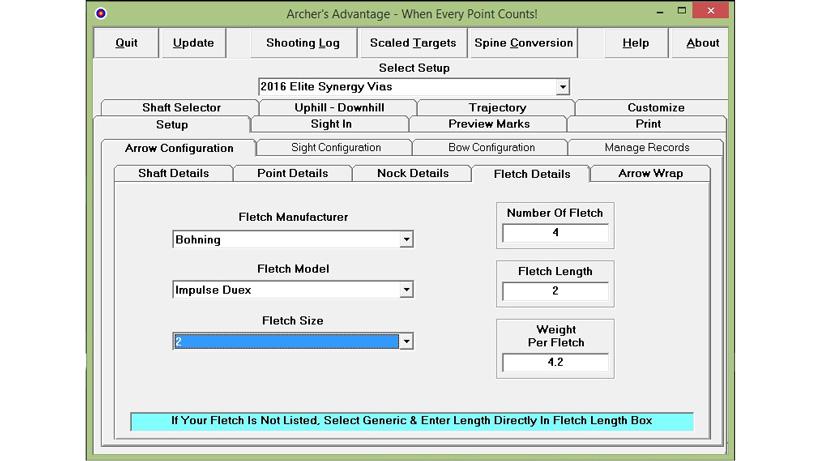
After finalizing your nock information, now go to the “Fletch Details” tab. In this tab, you will input all of the information regarding your fletching.
As always, if the fletchings you are using are not present you can select generic and enter your information by hand.
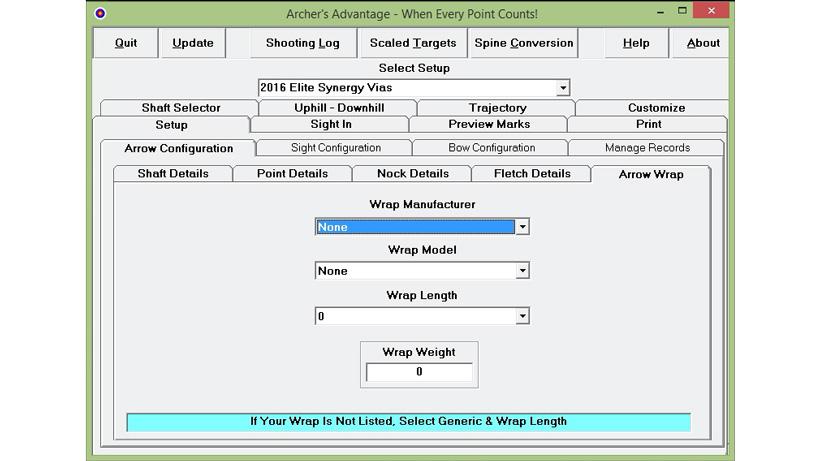
To finalize your arrow setup, click on the “Arrow Wrap” tab. If you're not using a wrap simply click on “none.”
While most wraps are in the program, I prefer to select generic and weigh my wraps by hand as different materials can vary slightly in weight.
Now, go back to the “Shaft Details” tab and enter your total arrow weight. The calculated weight should be close but not necessarily dead on. If the weight is different, simply highlight the “Measured Weight” box and enter your arrow’s weight as weighed on a grain scale. As you can see in the window below, the program accurately calculated the weight of my finished arrow.
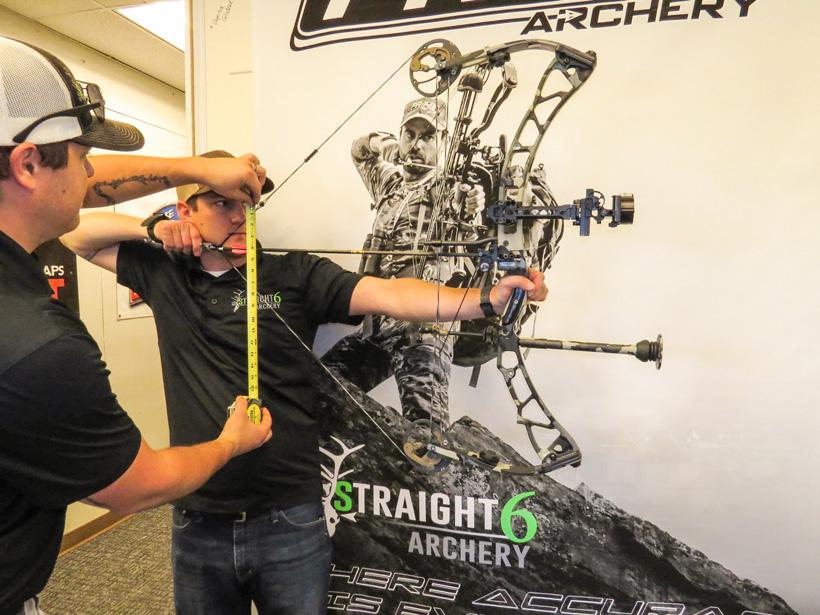
At this point, all of your vital arrow information has been entered and you can move onto your sight. Measurements will need to be taken while the bow is at full draw and having a friend to help can be a lifesaver otherwise you need to put the bow in a draw board.
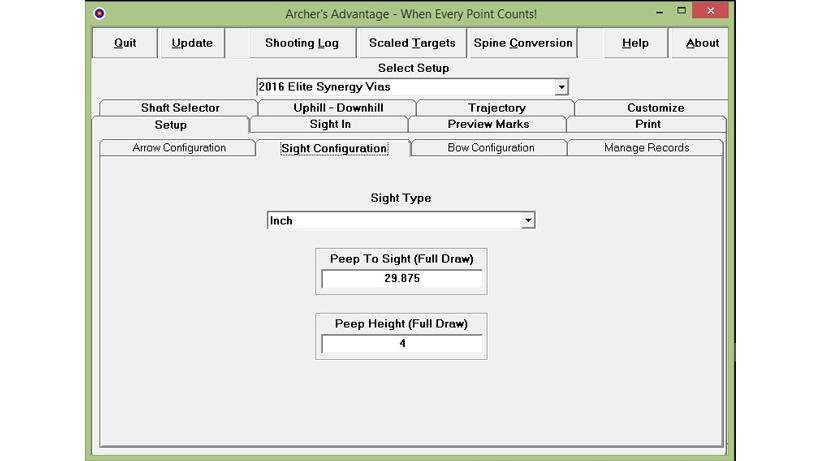
While under setup select the “Sight Configuration” box.
As with the rest of your measurements, these need to be exact and precise. Measure twice if needed and enter your information.
Once your sight is measured and entered, it’s time to move onto your bow’s information. Navigate to the “Bow Configuration” tab and then click on the “Select Bow From List” sub tab.
Most of the remaining information (limbs, cams and year) should be autofilled at this point but it may be necessary to choose this information manually if your bow model was available in different options or specs. If your bow cannot be located in the drop down menu then skip to the next step where you can enter your information by hand.
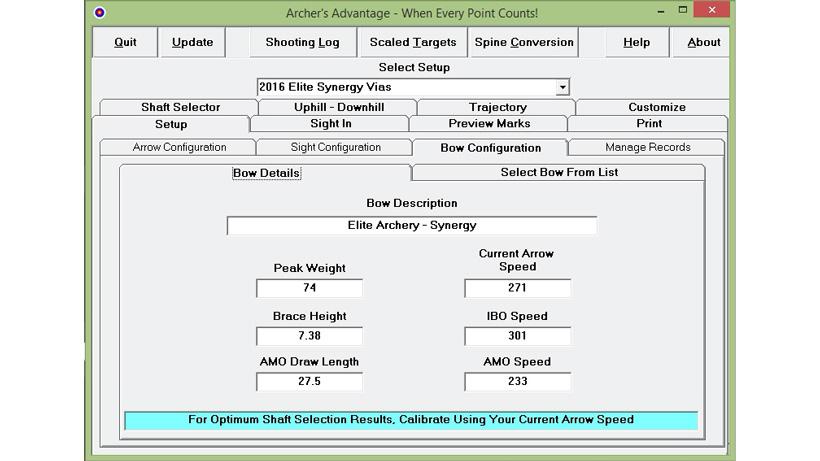
Now that you’ve selected your bow information,you will now enter the “Bow Details.” On this page you will enter a few more pieces of vital information.
If you are entering your information manually because your bow could not be located on the drop down menus in the previous section then you will also need to enter your brace height and IBO speed rating. These specifications can be found on the manufacturer's website. It is important to note that at this point the program has calculated a speed for your bow represented in the “Current Arrow Speed” box. This number is not entirely accurate and will be changed to an actual measured number in the next step.
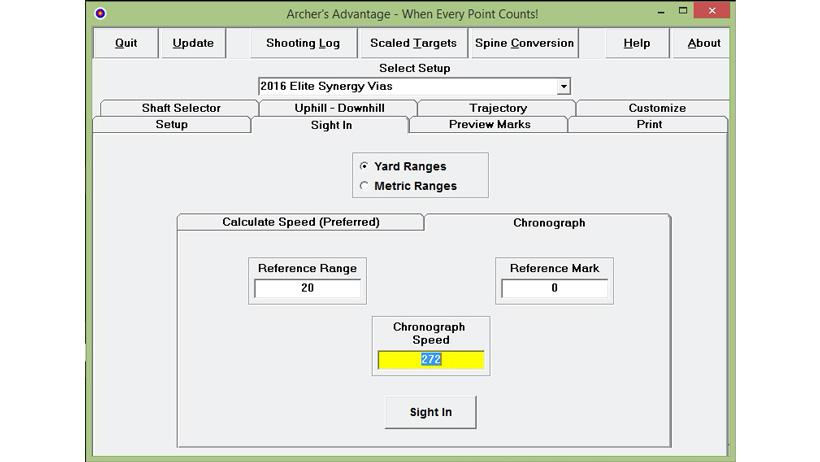
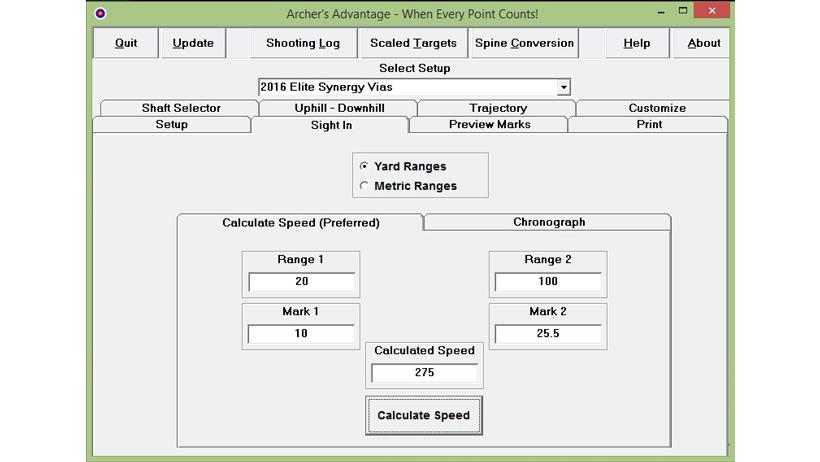
This is your last step of data entering and you are much closer to having a completed sight tape. For this step, you will see two options after clicking on the “Sight In” tab with the “Calculate Speed” and “Chronograph” sub tabs. The calculate speed tab is used for sights with sight in marks placed on the sight directly from the manufacturer. These are typically only found on target sights and since this article is aimed at hunting sights we will focus on the chronograph tab instead to enter our data.
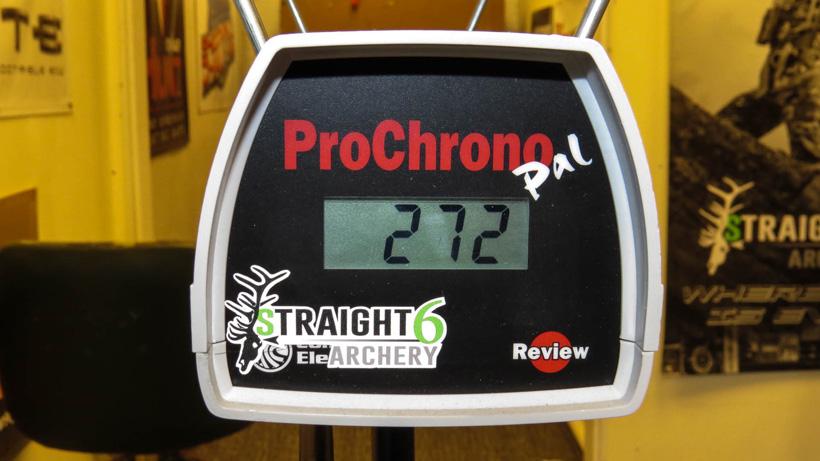
For this step, a chronograph is needed and it may be necessary to borrow one from a friend or head to your local shop.
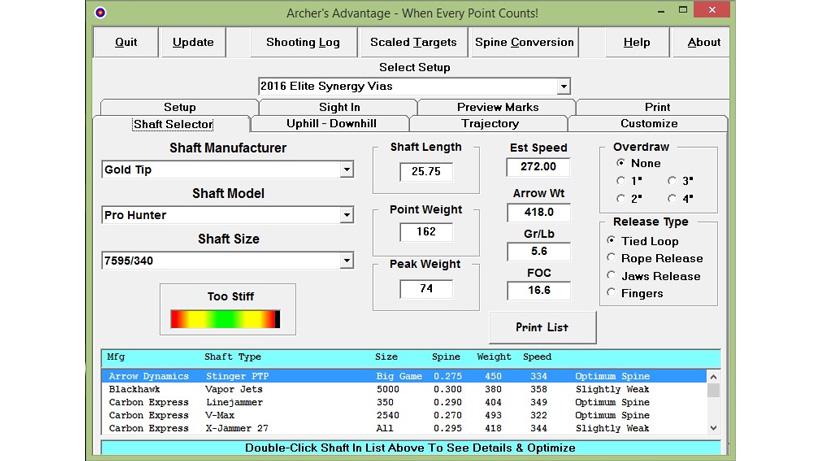
To double-check everything, I will click on the “Shaft Selector” tab. Under this tab you will find most of the information you’ve just entered into the program. It’s a good idea to double-check that it is all represented and accurate. Also, at this stage, you can now designate what form of release you are using (tied loop will cover bow’s using a D-loop) as well as the size of an overdraw if one is being used. If any of the information is incorrect, click back to the appropriate tab and ensure all of the information has been entered correctly.
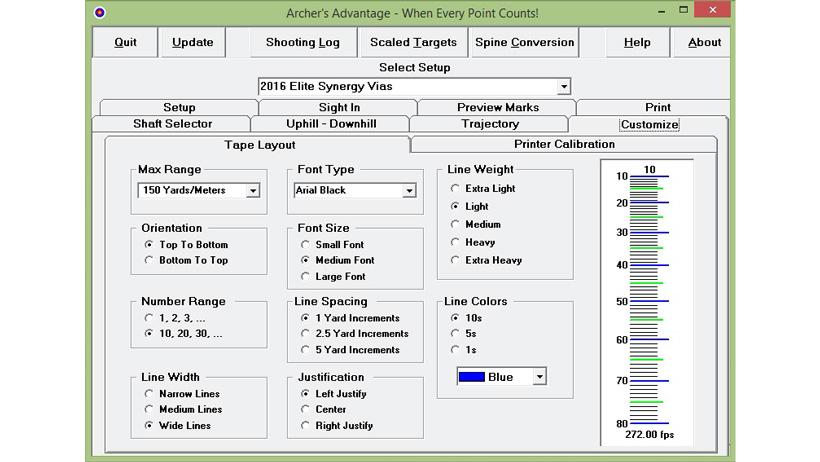
Now that all of your information has been entered into the program, you can now customize your tape to your liking and get ready to print it. Navigate to the “Customize” tab and you will now be given multiple options for customization.
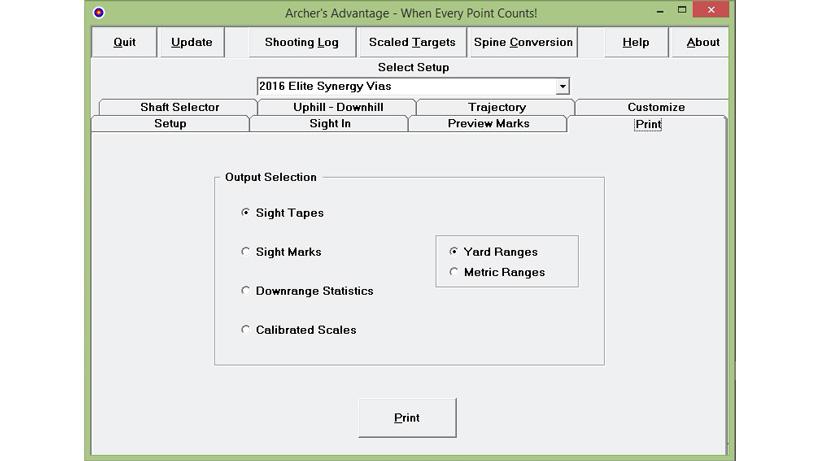
Now that you have entered all of your information, double-checked its accuracy and customized the tape to your liking, it is time to print. Navigate to the “Print” tab.
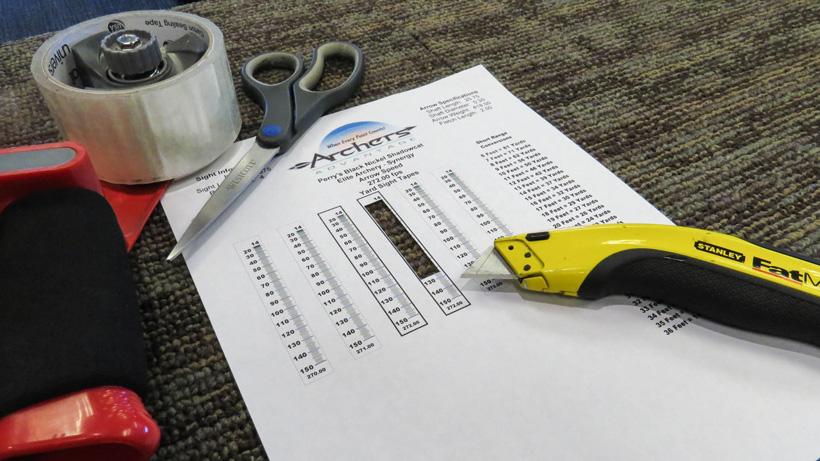
Now that your tape is printed, it is time to install on the sight. There are many ways to attach the tape to the sight and there are no right or wrong choices. Here’s how I attach them to my bow: I usually cut my tapes out with a razor blade or razor knife as this will give me the cleanest cut. Before attempting to attach the tape, it is important to do a few dry runs and see how exactly the tape wants to lay down, some trimming may be required. For single pin sights many will start their tape at 20 yards but people with multiple pin movers will more than likely opt to start their tape based on their last pin (A 5 pin mover’s tape will generally start at 60 yards in correlation with the last pin).
Once my tape has been sized to my available space, I take a section of clear packing tape and stick it to the numbered side of the sight tape. Trim the edges to fit the approximate size and shape of the working area and attach the tape to the sight. Be sure to run a finger along all of the edges so it is adhered completely and check that there are no corners or lips peeling up. Trim any excess tape and you’re finished. This packing tape not only attaches the tape securely to the sight but it also waterproofs it so you will not experience any running ink if hunting in inclement weather.
The short answer is yes! Along with the software to build the tapes, many of these programs also include additional tools that can severely cut down your setup process and lead to a more accurate and precise hunting setup.
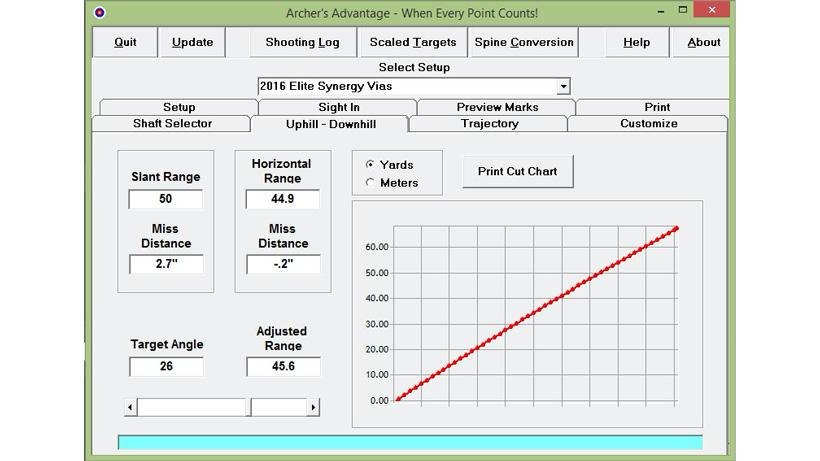
The “Uphill-Downhill” tab will allow you to enter a downhill or uphill range (“Slant Range” box), select your angle of shot (“Target Angle” box), and then calculate your adjusted aim for range (“Adjusted Range” box). While most of us are using angle compensating rangefinders that already do this for us this can be an extremely useful tool for 3D competitions where rangefinders are not allowed. This program will also allow you to print out your cut chart which can be a great backup tool to take into the backcountry in case your rangefinder decides to die when the shot of a lifetime is presented.
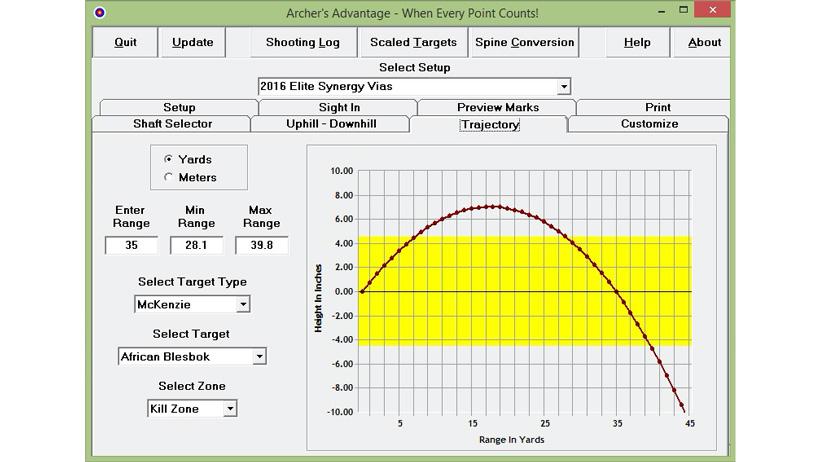
Now we can really geek out! With the “Trajectory” tab, the program will give you an exact arrow path for your setup at a given distance. In the example below, you can see that if I set my single pin for 35 yards I will be approximately 6” high at 25 yards and about 6” low at 40 yards. This can be extremely useful in deciding where to leave a single pin set to cover the most ground before an adjustment is needed while hunting. Along with the trajectory curve, I can also select targets based on the game I am hunting and the kill zone area will be represented in the yellow bar. While this is based on foam animals, it can still provide an accurate representation of what to expect with your bow and allow you to tailor a sight setup to cater to your hunting style.
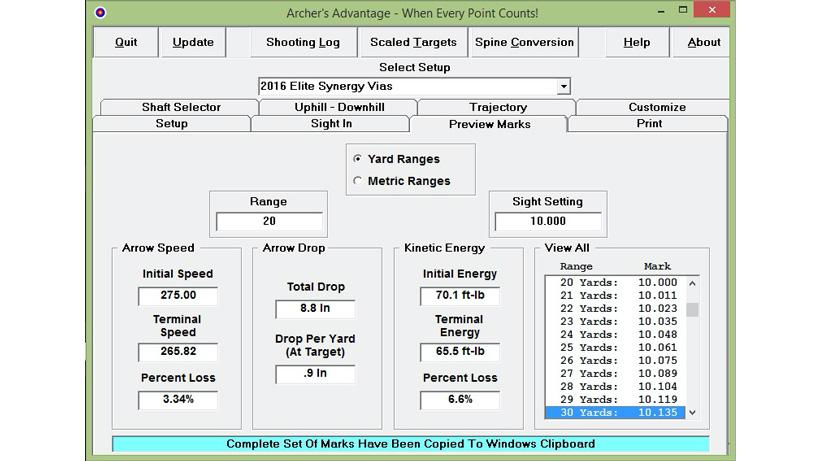
Perhaps one of the coolest little gems on this program are the previews marks, which allows multi pin users to sight in their bows before ever heading to the range. This can be used on moving and fixed position heads.
Now, for all intents and purposes, we are going to consider our 20 yard pin as our zero which is represented as 10.000”. By looking at the “View All” box I can see that the sight setting for my 30 yard pin will be 10.135”. Set a micrometer to .135” and set your pin gap from the 20 to 30 yard pin to match this measurement. Move on to your 40 yard pin and set it to the represented number, again measuring from the 20 yard pin down as this is your zero. Take your time with this process and you will only need to fire one arrow for each pin at the range to verify your setting.
Now that you have an accurate sight tape made and your bow’s roughly sighted in your final check at the range should be very short. With these programs, be sure to utilize all of the customization options that you can to perfectly tailor your tape to your bow and yourself. Expect to make several tapes along the process until you get everything exactly as you like it. Once a tape design and layout has been finalized it is also a great idea to put a few extra tapes in a waterproof bag in your pack. The last thing you want is months of scouting, planning and preparation to go out of the window because a tape is lost or ruined
Bow
Complete hunting arrow with field tip
Arrow weight scale
Bow scale
Tape measure (a buddy can be very handy for this)
Clear packing tape
Razor blade
Scissors
Label making tape (optional)
Micrometer (optional)
The Archery Program (TAP)
Having a buddy on hand can be very useful in getting the correct measurements.
The computer programs can first appear very intimidating, spend some time exploring the options prior to building a tape.
Measurements need to be exact and accurate (remember measure twice cut once?).
Measurements need to be in exact decimal points,the table below will giv common measurements.
Select shaft manufacturer.
Select shaft model.
Select shaft size.
Enter arrow length (carbon length only — do not include insert or nock).
Enter point weight.
Select point adapter (insert) manufacturer.
Select point adapter model.
Select nock manufacturer.
Select nock model.
Select fletching manufacturer.
Select fletching model.
Select fletch size (if more than one option is available).
Enter the number of fletchings (e.g., three or four).
Select wrap manufacturer.
Select wrap model.
Select wrap length.
Select sight type. Certain sights that utilize round wheel adjustments (e.g., Spot Hogg) will need to have sight tapes generated differently than those that use vertical wheel adjustments (e.g., Black Gold). If you do not see your specific sight then simply select “Inch.”
The peep to sight measurement needs to be done while at full draw. Measure from the sight pins horizontally to the center of the peep sight.
The peep height measurement needs to be done while at full draw. Measure from the center of the peep to the center of the arrow shaft in a vertical line.
Select bow manufacturer from drop down menu.
Select bow model from drop down menu.
Click “Transfer Data to Current Setup.”
Enter the bow's peak weight.
Enter the bow’s draw length.
Chronograph your bow.
Enter your information in the “Chronograph Speed” box.
Click “Sight In.”
Maximum range: This simply refers to how many yards the tape will read out to. In my experience, most bows will not have sight clearance past 120 yards with some reaching 140 yards on the extreme end. I like to leave this set at 150 yards because it will give me the longest tape to work with.
Orientation: This changes whether the ranges start from the top down or the bottom up. Most sights will generally start from the top down but some (HHA) will start from the bottom up. It is important to check with the manufacturer if you are unsure.
Number range: This will change whether you want the tape to read out every yard (1, 2, 3, 4, etc.) or read in ten yard increments. In the interest of not having a jumbled up mess, I always select the 10 yard increment option.
Line width: This dictates how far the yardage lines will extend horizontally from the range numbers. I like to leave this on wide as it will give me the biggest surface area for my indicator pin to cover, which leads to more precise dialing at longer distances.
Font type: This will simply change your style of font. I like to leave mine on Arial Black as this is the cleanest and easiest to read for me.
Font size: This will merely change the size of the range numbers. I generally go with medium as I can see the numbers easily and this will make for easy adjustments in the field. Some experimenting may need to be done here as larger numbers means a bigger tape and you may have issues getting the tape to fit properly on the sight.
Line spacing: This will control the black lines found between the major yardage markers (green and blue in the example). Again, this will take some playing to get your desired effect. Faster bows will lead to closer lines which can appear crowded and messy at shorter distances. I prefer 1 yard increments as this will allow more precise dialing, specifically at long distance.
Justification: This will be determined entirely by your sight and its design. By changing the justification, the numbers will appear to left of the scale, right of the scale, or on both sides of the scale.
Line weight: This refers to the thickness of your yardage marks. As with the other options, this will take some experimenting to find the right combo for your setup. I prefer the “light” setting as this will give me small and easy to read lines that are still heavy enough that it doesn’t take much effort to read while in the field. As line size is increased the tape will become more crowded.
Line color: This one is fairly self explanatory, but often overlooked, especially for those who use single pin sights. In less than ideal conditions while hunting, I need a tape I can see easily if I need to make a sight adjustment on the fly. For my eyes, blue and green are two colors that just “pop.” Experiment with the colors in different lights and see what works best for you.
Ensure “Sight Tapes” is selected.
Choose whether you want your tape printed in yards or meters.
Click on “Print.”
Click on the “Preview Marks” tab.
Select yard or metric ranges.
Highlight the “Range” box and enter your begining range (most will start with 20).
The program should default to a sight setting of 10.000 as seen in the “Sight Setting” box.